Creating Projects on Cloudoor
We designed this section for Project Owners and Project Owners+. These are users who handle projects and teams.
Throughout this section, you will follow an adoption program to ensure all stakeholders have an good grasp of what Cloudoor has to offer for their organization
If Cloudoor has been well-configured thanks to your super-admin, you should discover a few things when logging in.
If we only count what will impact you directly, you should notice:
-
Cloudoor's Dashboard (a.k.a your homepage): This gives you an overview of all applications in the organization, all integrated clusters, and their resources consumption
-
Cloudoor Projects: This shows all the organization's projects and lets you create, manage, and delete the ones you own.
-
Cloudoor Deploy: This allows you and your team to deploy your environments into production in seconds.
-
Cloudoor Members: This lists out the other users of the platform with their role (IAM section).
-
Cloudoor Clusters(Hub): This gives you an overview of your clusters and will allow you to add managed and custom clusters.
-
A parameters section: That contains:
-
Pre-Defined Quotas you can use to facilitate the quota requests for your project.
-
Pre-Defined Tags that will be asked of you when creating your project
-
By following this journey, you should, at the end of the day, be able to handle Kubernetes projects, from their creation to deployment, without any deep Kubernetes knowledge required.
Without further notice, let's dive in!
Importing Namespaces as Projects
Namespaces are the same as Cloudoor Projects, any namespace you import will be listed under Cloudoor Projects.
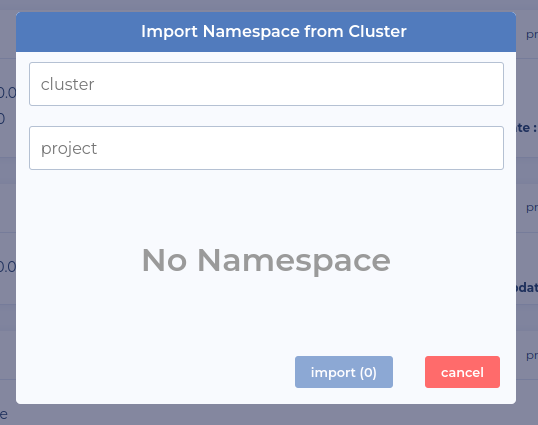
To import a namespace from any of your clusters, simply head to your dashboard and click the Import Namespace button under the Clusters overview.
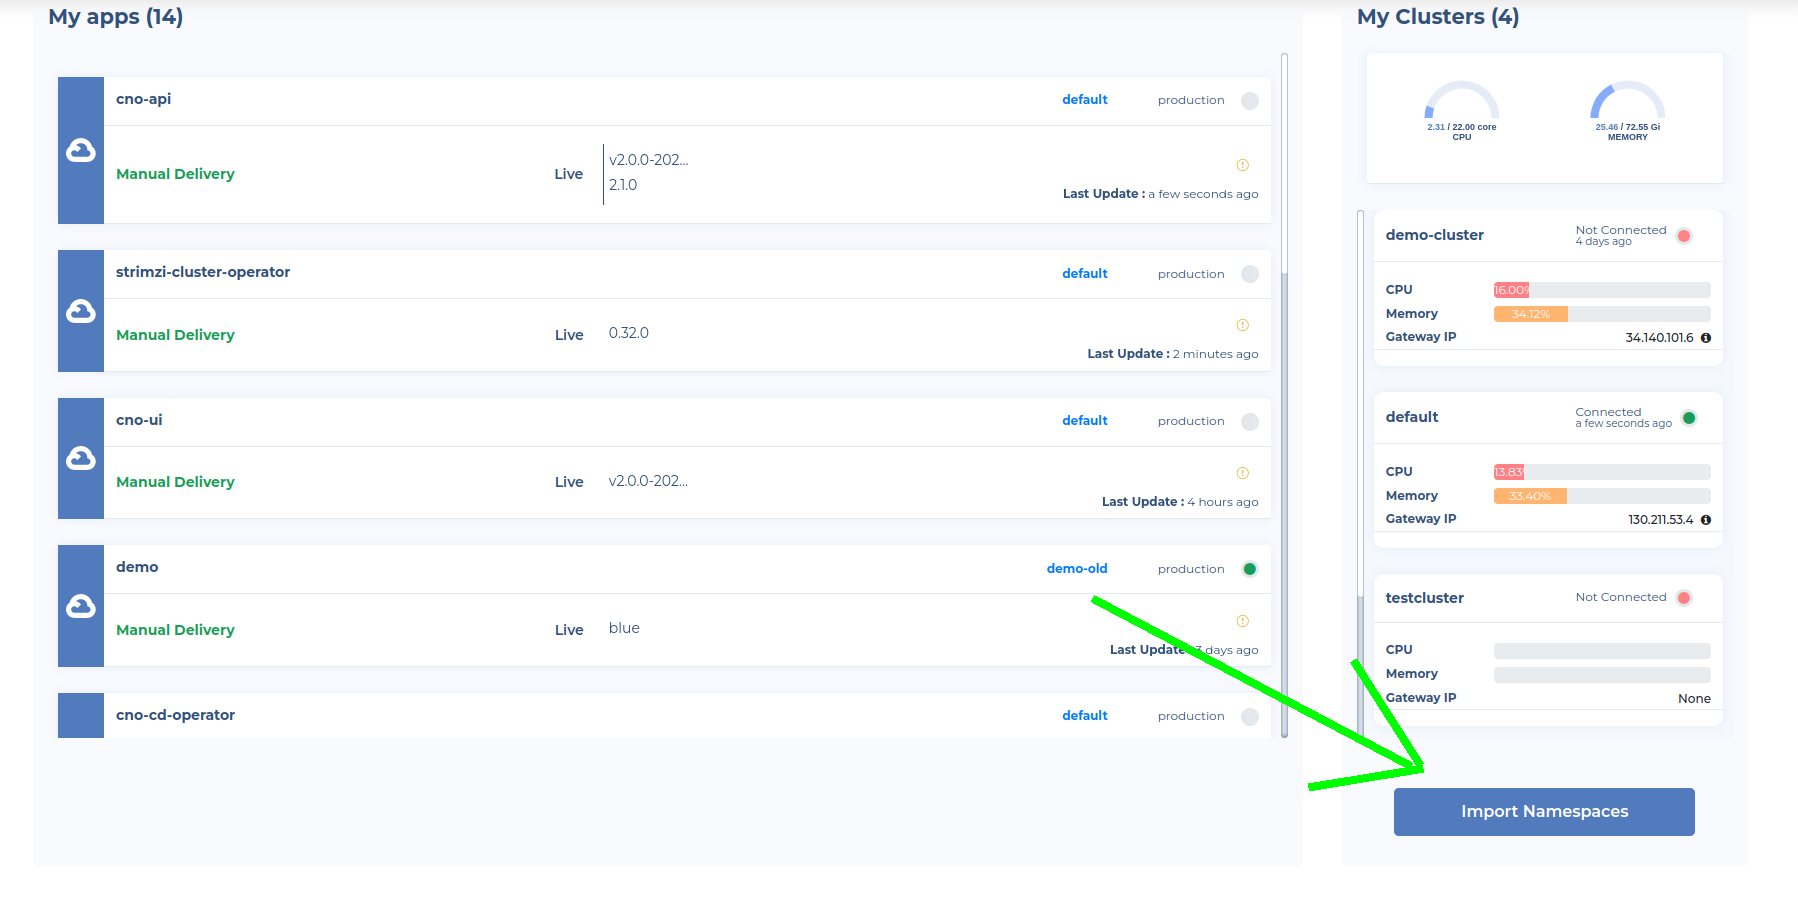
Choose the cluster, then choose the namespace you wish to import and Voila!
Your namespace is now a Cloudoor Project. You can find and mange your projects in Cloudoor Projects.
Creating a Project using Cloudoor's UI
Go to Projects
Click on "Add a new project" on this board at the top right.
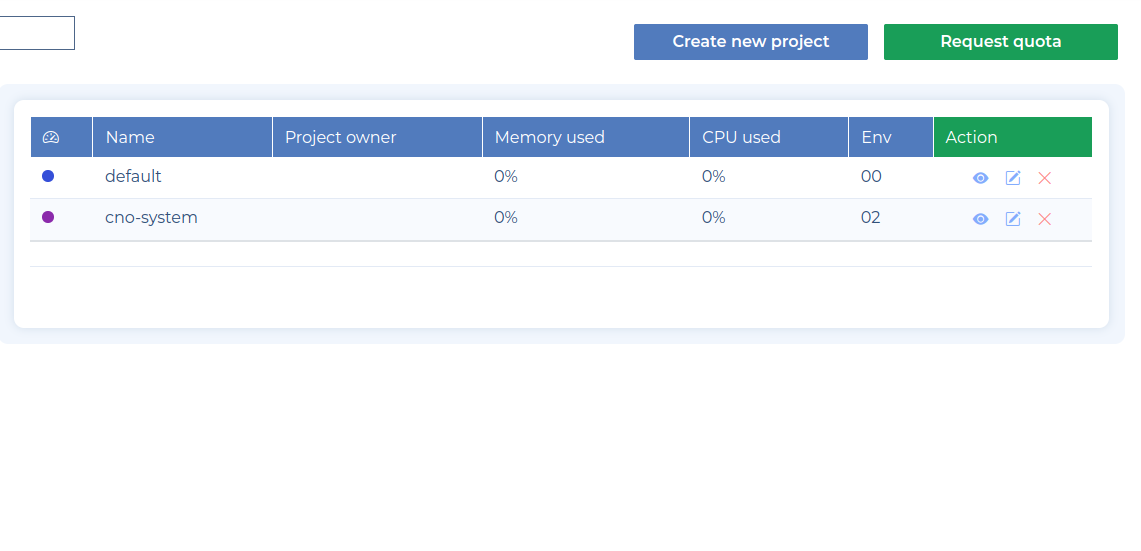
You'll be taken to the Creation Form
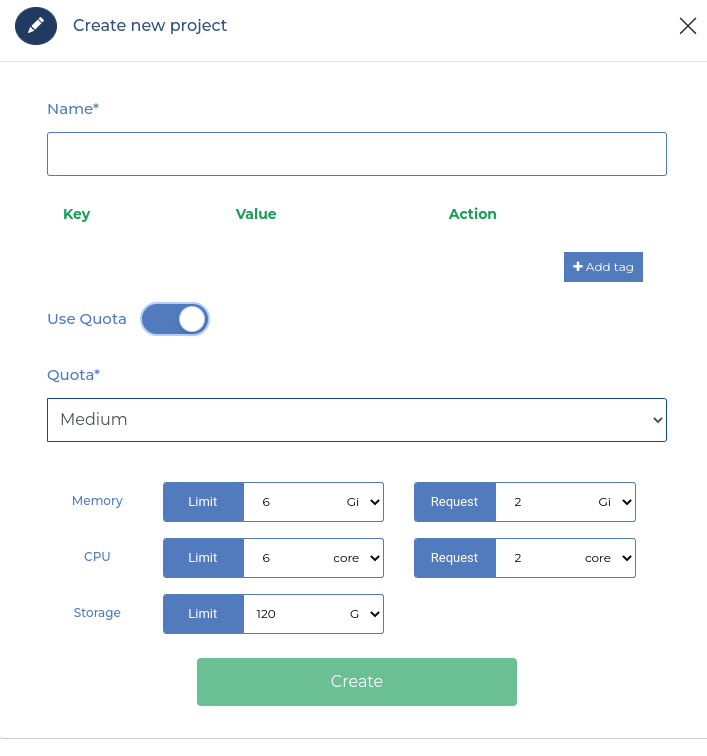
Fill out the Creation Form
- Specify the name of your project
- Fill in the mandatory tags
- You can add tags if you think it's relevant for your specific use case
- Select the proper quota for your use case from the by-default quotas
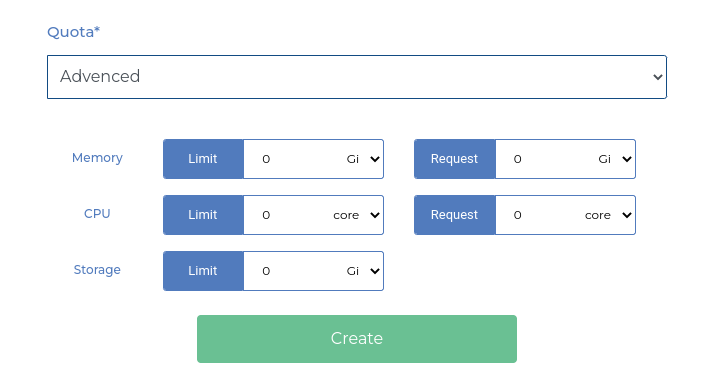
OR - Click the "Advanced"Dropdown and specify in detail the requested resources (CPU, Memory, Storage) you believe are relevant to your project
- Press Add. Congrats, you've successfully created your new project.
Project Owner vs. Project Owner +
Depending on your role, your project resources quota request is automatically accepted or pending.
If you are a Project Owner, your quota request is subject to validation: Your project is considered pending after clicking "Add" until a Validator validates this quota request.
If you are a Project Owner + (a self-provisioner), the project is automatically accepted and created
Creating a Project Using DOOR
If you want to use pre-defined quotas, you can create a project with the command:
door create project <projectname> --quota <quotaname> --tags <tagName>=<tagValue>,<tagName>=<tagvalue>
If you want to define your own quota values, use the command:
door create project <projectname> --cpu <LimitValue,RequestValue> --memory <LimitValue,RequestValue> --storage <StorageValue> --tags <tagName=tagValue>,<tagName=tagValue>
The Projects Dashboard
Now that a project has been created, you have complete control and can start managing it.
You will find your project created and ready for administration on the project board, where all projects are listed. 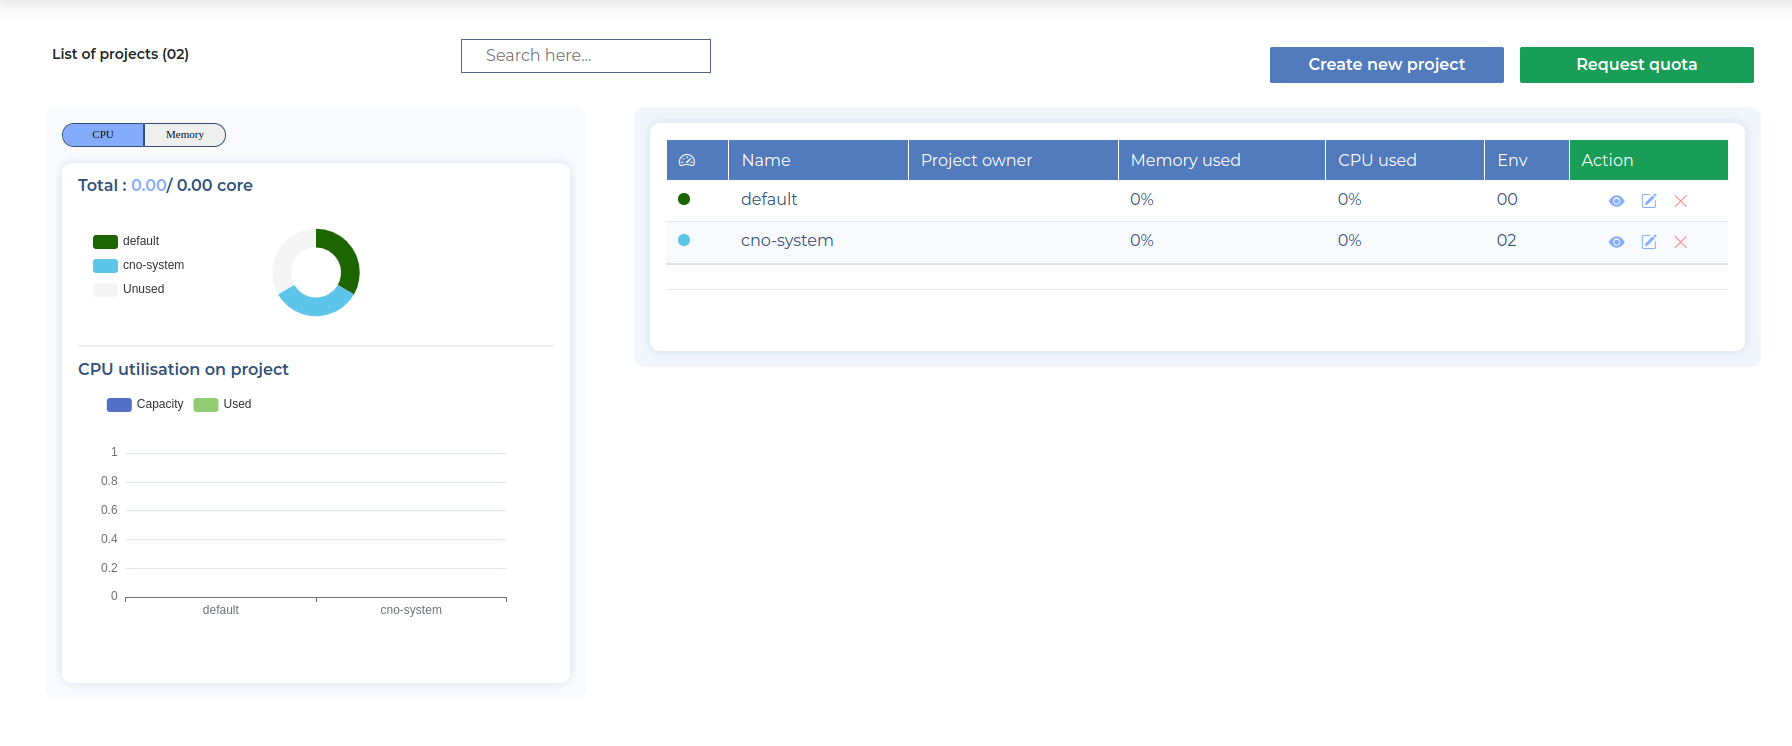
From here, you can:
-
Administer
-
Edit
-
Delete your project.
We will show you the administration section in the following tutorials.