Adding Environments to Projects in Cloudoor
This section will show how you can create new environments or add your already existing environments, to your project from the Hub clusters previously added.
You have two ways of adding projects environments: from Cloudoor's User Interface or through our command-line, door
Adding Environments to Projects through Cloudoor's U.I.
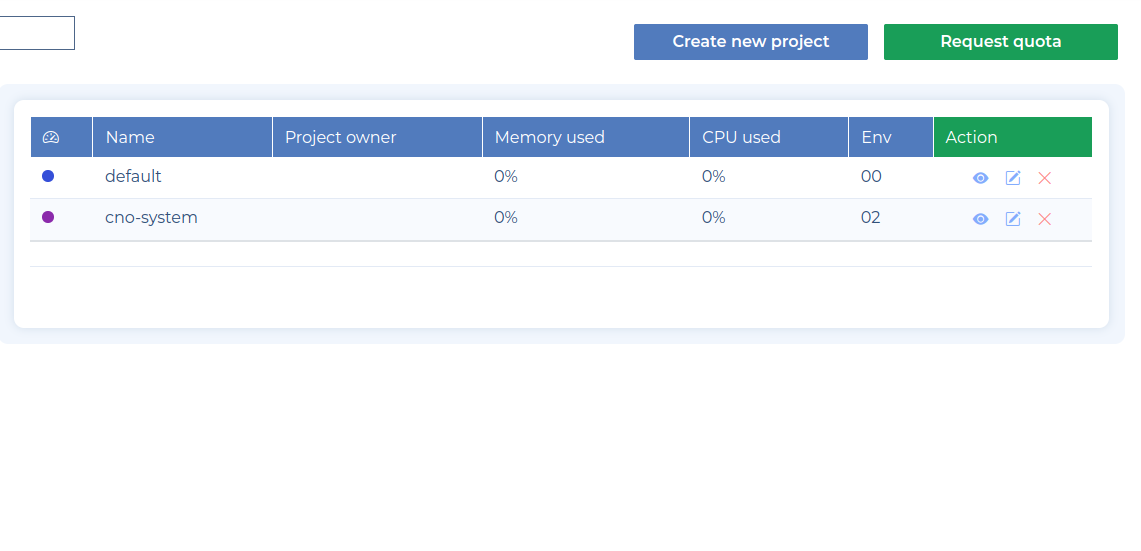
Go to Projects
Enter your project by clicking the eye icon besides your project.
Allocate Resources to your Project - Optional
Head on to Managing Quota Requests
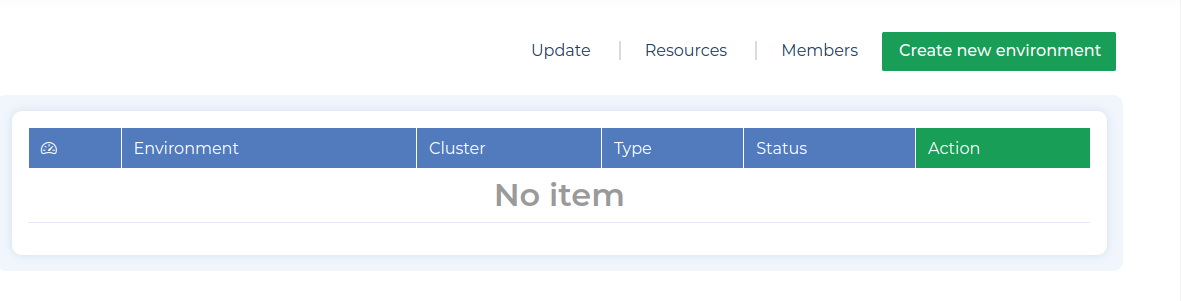
Create an Environment
Let's create «Myfirstenv.»
Click on Add New Environment in the upper right corner
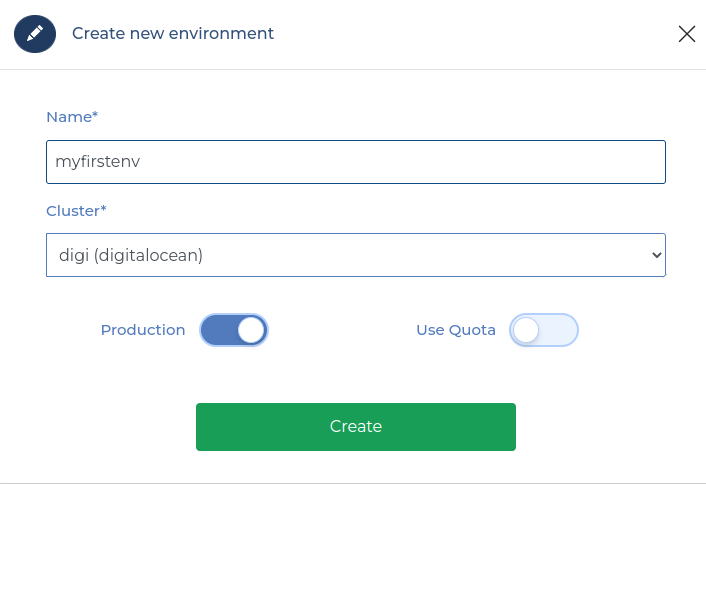 Fill Out The form.
- Select the cluster.
- Check if the environment is in production. Leave if the environment is under development.
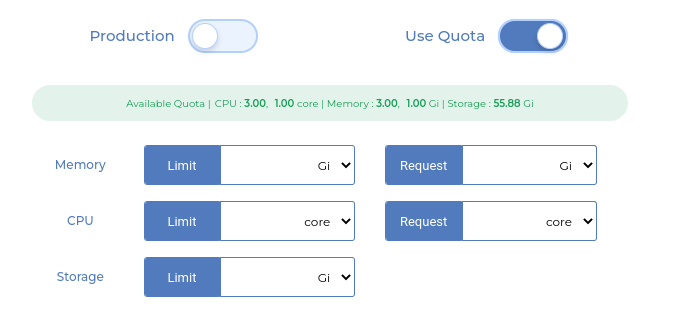
- OPTIONAL: Use Quota: Indicate CPU, Memory & Storage resource limits (the maximum value that the cluster needs to function)
- You'll need to have allocated resources to this project before you can Use Quota. Go here for resources allocation
- Press Add & repeat this action for each environment to be added to your project.
Warning
The addition of an environment is not subject to validation.
Your resource allocation within your projet cannot exceed the project quota.
In our example, default imposes the limit of 1 core (CPU), 1 Gi (Memory), 55 Gi (Storage). Of course, we can ask for more, even more, if the project consists of several environments.
Addition Successful
Congratulations, your environment has been created. You'll notice that its status is «Creating». This is normal as the creation is not instantaneous, it'll take a few minutes then it's status will change to «Ready»
You'll also notice 3 symbols to the right of your environment status:
-
- This is for viewing you environment page.
-
- You use this to update your environment details.
-
 - For deleting your environment
Info
In case your environment requires more resources to maintain it, you can increase/decrease by editing or viewing the targeted environment within the defined limits of the project.
It's almost time to put your beautiful resources to use! But first, we'll look at how to increase your project's replenishment in the next tutorial.
Adding Environments to Projects through DOOR
If you have resources in a project e.g my-first-project, you can create an environment.
We can specify resources by using --cpu, --memory and --storage flags.
You have two ways to onboard an environment on Cloudoor:
- By importing an existing namespace on a cluster with the command:
door onboard namespace <namespaceName> --project <projectName> --cpu LimitValue,RequestValue --memory LimitValue,RequestValue --storage StorageValue
- Or by creating a new environment with the command:
door create environment <name> --project <projectName> --prod true|false --cluster <ClusterName> --cpu LimitValue,RequestValue --memory LimitValue,RequestValue --storage StorageValue
Finally, you can run the following command to get insights about the environments of your projects.
The result should look like the following:
| NAME | CPU LIMIT | CPU REQUEST | CPU USED | MEMORY LIMIT | MEMORY REQUEST | MEMORY USED | STORAGE | STORAGE USED | STATUS |
|---|---|---|---|---|---|---|---|---|---|
| prod | 2 | 1 | 0% | 3Gi | 1.5Gi | 0% | 10Gi | 0% | Ready |
| dev | 2 | 4 | 0% | 4Gi | 8Gi | 30% | 500Gi | 0% | Ready |
The Status of an environment can be Ready, Pending, or Failed.
Typically, the "Pending" status should only take a few minutes.
If you find any problem during this phase, it's undoubtedly due to a lack of connection between the cluster and your Kafka. Just reload, and it should be okay.