Canary Deployment with Cloudoor Deploy
With Canary deployment, you can deploy your app in two versions directly in the production environment and transition from one to the other through percentage and easily rollback if the new version is not viable.
Prerequisites: By this stage, you should have already created your deployment and service. If you haven't, head back to Continuous Deployment
Deploying the Canary Strategy from Cloudoor UI
Go to Deploy.
You’ll see all your applications. Filter if you want and click the app you wnat to update. 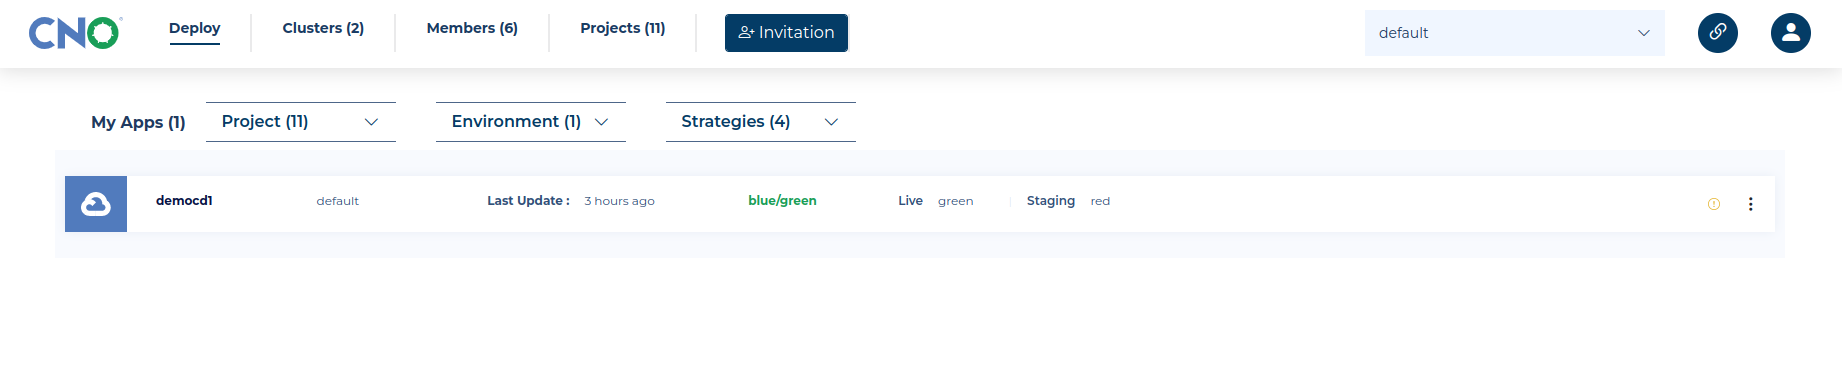
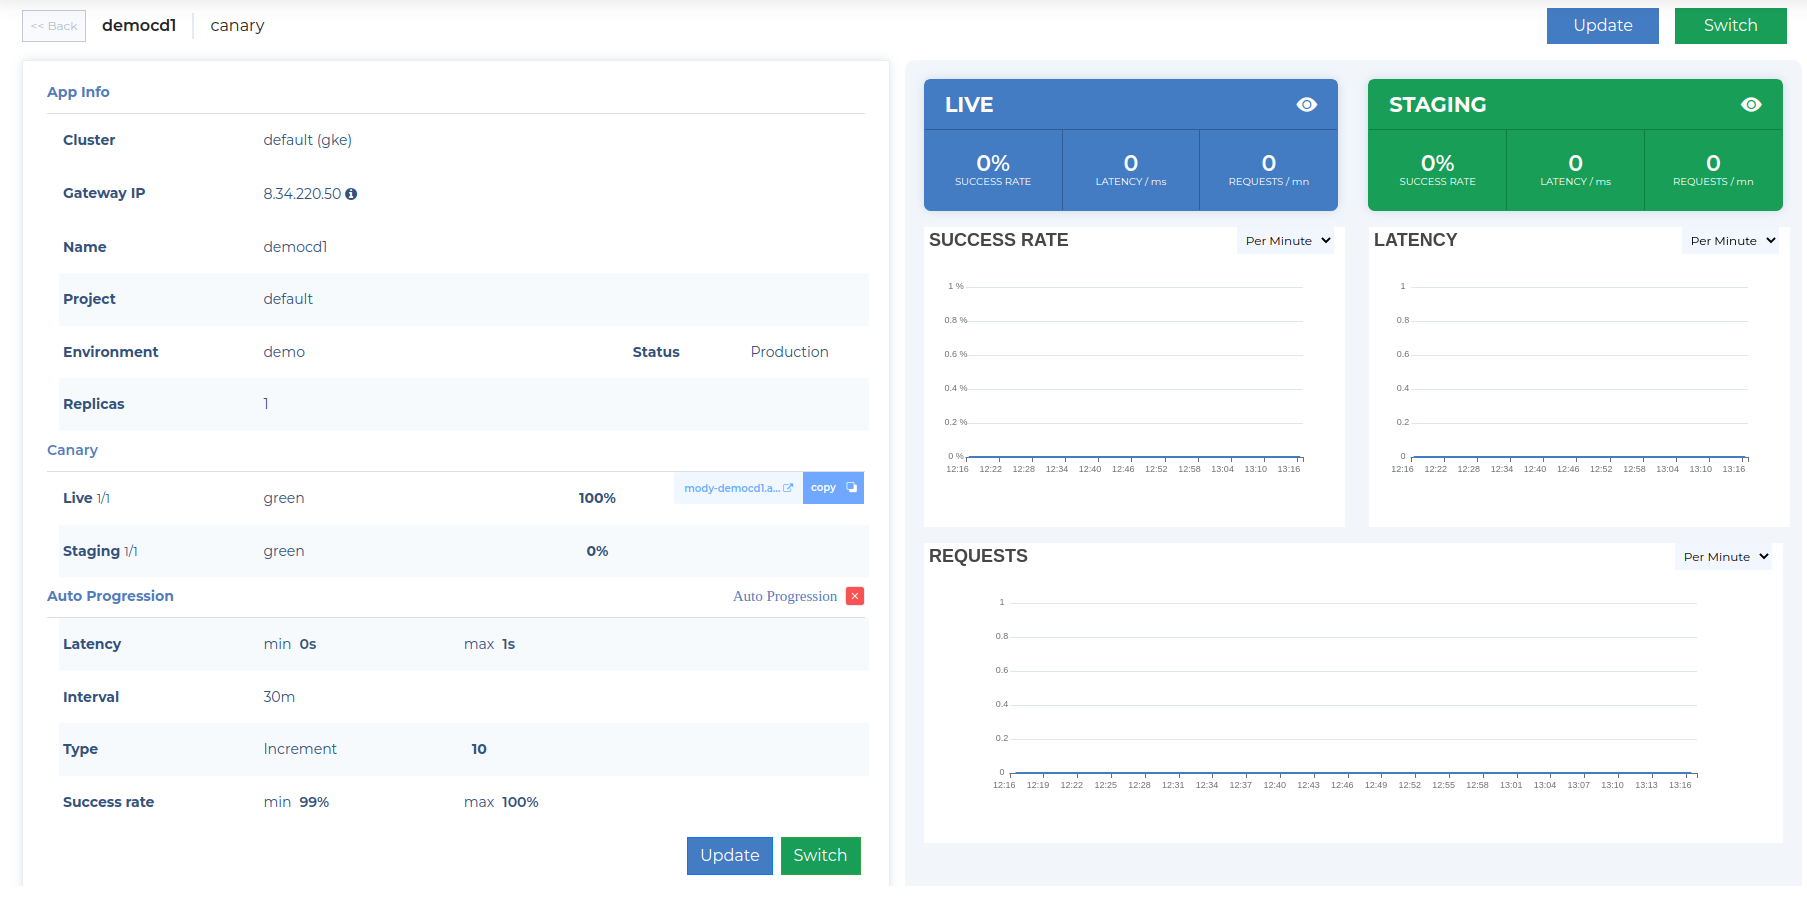
Here, you can find the API Gateway IP. Monitor the Success Rate, Latency and the Requests per min of the Live and Staging versions of your application. And visit either versions using the url in front of the version. 
Click Update
Your application is currently in Default Deployment Strategy, Click Default and choose Canary from the drop down. 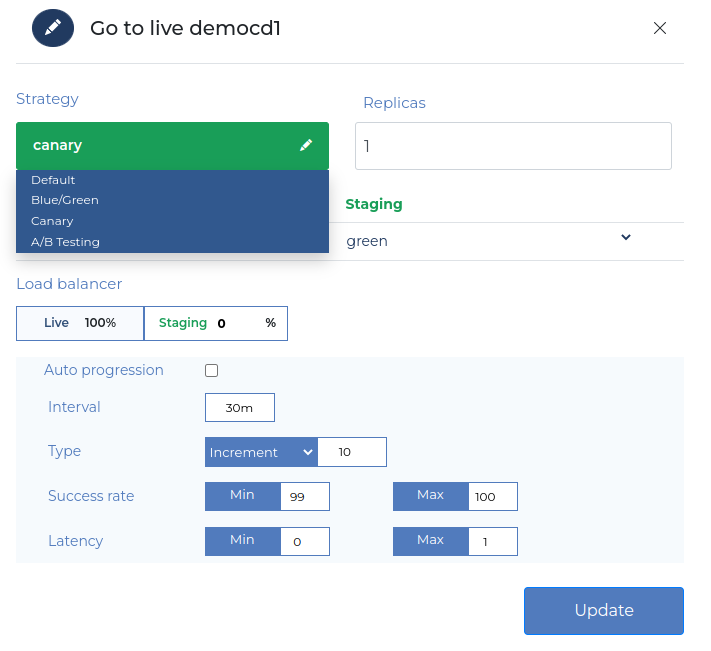
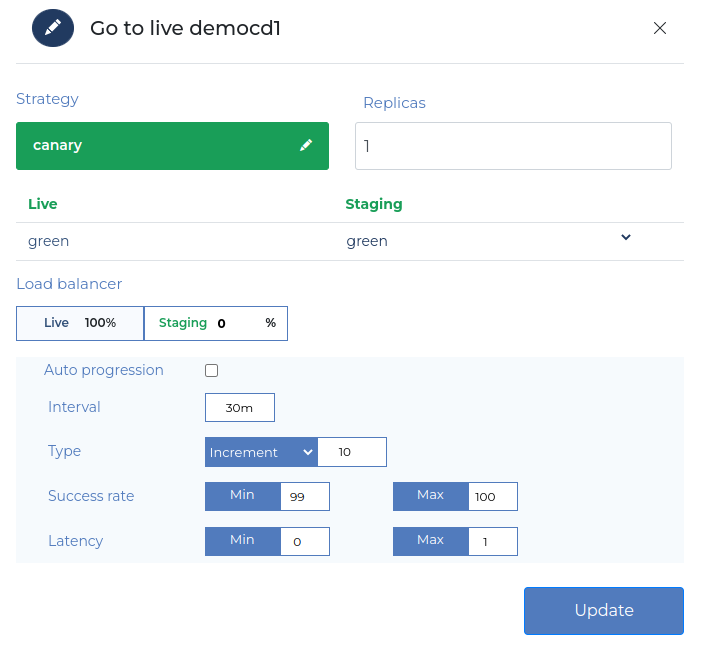
You can effectively manage your canary deployment through the Cloudoor UI Edit Form. From scaling up and down your application by changing the Replicas number, choosing the right version for your staging application to manually and automatically increasing traffic to your staging application.
Deploying the New Version with Cloudoor UI
To deploy the new version to your staging environment, simply click the dropdown next to "Staging" and choose the correct version from the image tags Cloudoor pulled from your company's docker image. Let's choose 'red' 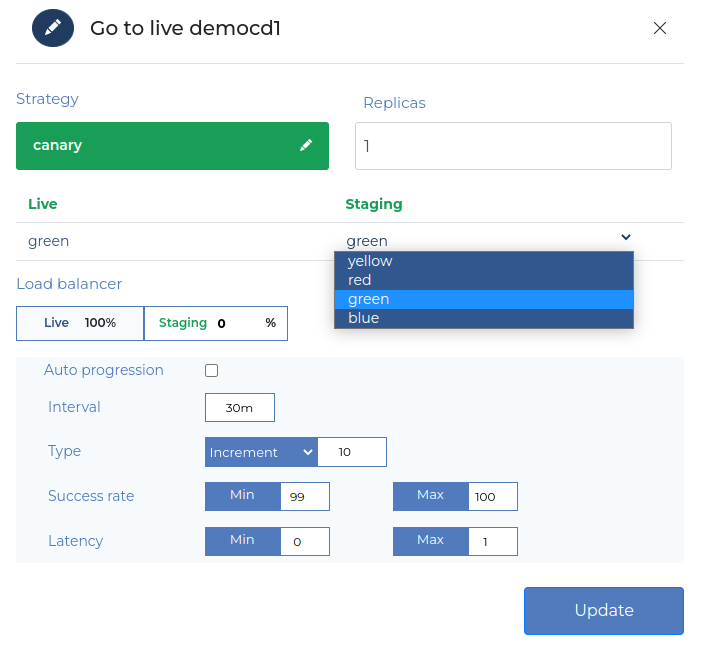
Increasing Traffic Manually with Cloudoor UI
To manually increase or decrease the percentage(%) of your total traffic your load balancer sends to your new version, simply type in the preferred percentage in Staging and click "Update".
Progressive Deployment
To automatically increase progression. Click the Auto Progression checkbox.
Auto Progression:
When enabled you don’t have to manually increase the progression of traffic to your staging application. You can set an interval and traffic will be automatically progressed when the conditions are reached. This is only accessible through the UI.
-
Interval(secs or mins): The period of time after which requests to the new version will be evaluated against the Success Rate and Latency Values, to determine if traffic to the new version will be increased or not.
-
Type- Increment(%): Degree of increase after every successful interval.
-
Type - Steps: The degree of increase after each successful interval e.g increase by 5% after the first successful interval, then increase by 10% after the second successful interval.
-
Success Rate(%): Degree of successful connections to the new version.
-
Latency(secs): How long it takes for the new version to respond to requests.
Click Update and have a look at your App Info Page
Advanced Configuration
Cloudoor API Gateway will be automatically installed in your Kubernetes cluster for traffic splitting. Domain Name and TLS certificate If you have a domain name and/or a custom TLS certificate, please add the following labels to your Kubernetes deployment: • listener.gocno.io/tls: “true” • Tlistener.gocno.io/hostname: «your hostname»
Switching - Going Live with Cloudoor UI
When you're completely satisfied with the new version of your application and you wish to push it live. Click the Switch besides Update 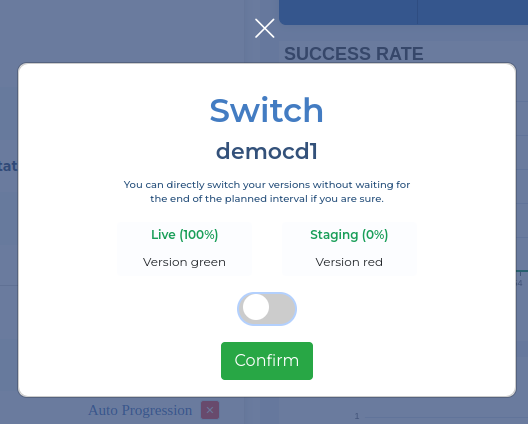
Toggle button and watch your Live Environment get up to date in real-time.
Click confirm and your application version in your staging environment will be pushed live while your outdated live application will be pushed to the staging environment, waiting for you to quickly switch back if you're not satisfied.
Deploying the Canary Strategy from DOOR
Run this command to deploy your workload with the Canary strategy:
Supported Flags:-e or –environment: The environment name.
-p or –project: The project name.
--traffic: This refers to the % of your users that will be routed to the new version.
--image: The docker image of your application. It should be in
--version: the version of your application docker image i.e the tag. When using the version flag, the image flag is required.
--go-to-live: To completely push the new version to live.
Let's look at your workload:
It should look similar to this:
| NAME | STRATEGY | REPLICAS | IMAGE | AUTO-DEPLOY | LIVE | STAGING | STAGING-TRAFFIC | HEADERS |
|---|---|---|---|---|---|---|---|---|
| workload Name | canary | replicas Number | username/workloadName | true/false | V1.0.0 | 0 |
Deploying the New Version
To deploy the new version of your application to
door deploy canary my-workload --image <image-name> --version v2.0.0 --traffic 5 -p projectName -e environmentName
Supported Flags:
--image: The docker image of your application. It should be in
--version: the version of your application docker image i.e the tag. When using the version flag, the image flag is required.
Setting Traffic
You can set the percentage (%) of your users that will be routed to the new version. Run the command:
Let's look at your workload:Results:
| NAME | STRATEGY | REPLICAS | IMAGE | AUTO-DEPLOY | LIVE | STAGING | STAGING-TRAFFIC | HEADERS |
|---|---|---|---|---|---|---|---|---|
| workload Name | canary | replicas Number | username/workloadName | true/false | V1.0.0 | 50 |
Advanced Configuration
Cloudoor API Gateway will be automatically installed in your Kubernetes cluster for traffic splitting. Domain Name and TLS certificate If you have a domain name and/or a custom TLS certificate, please add the following labels to your Kubernetes deployment: • listener.gocno.io/tls: “true” • Tlistener.gocno.io/hostname: «your hostname»
Going Live with DOOR
To push your new version to completely replace your old version, simply run the command: