Onboarding Your Cloud Provider
You can add your Public Cloud Providers here. To add your Kubernetes Clusters that is not EKS, AKS, or GKE. Head to Add Clusters.
AZURE (Microsoft)
How to get the Cloudoor form information?
Step 1
Create a "SERVICE PRINCIPAL" (app registration) and retrieve information such as : Client ID, Client secret, Tenant ID
- Log into your Azure portal
- enter "app registration" on the search bar
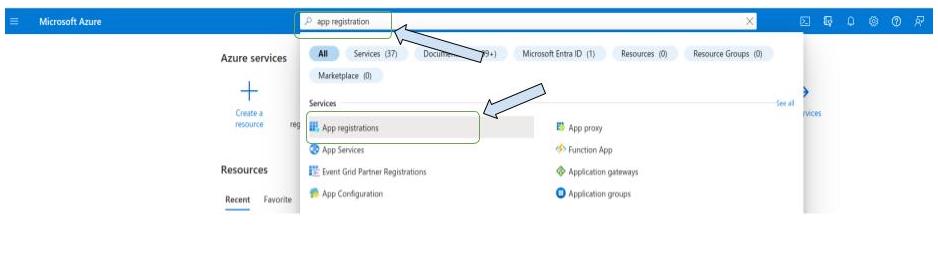
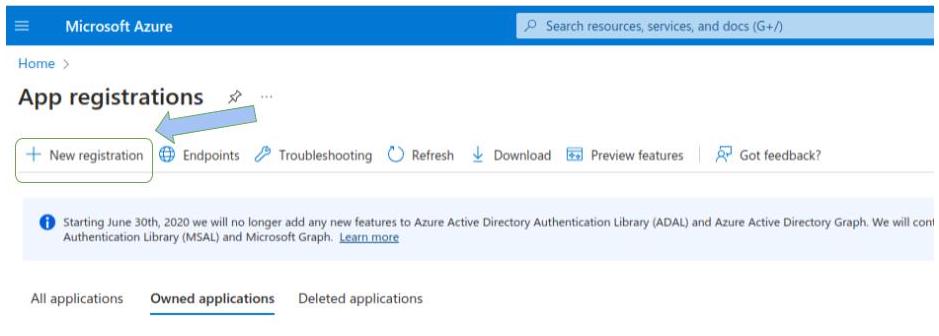
Click on "new registration".
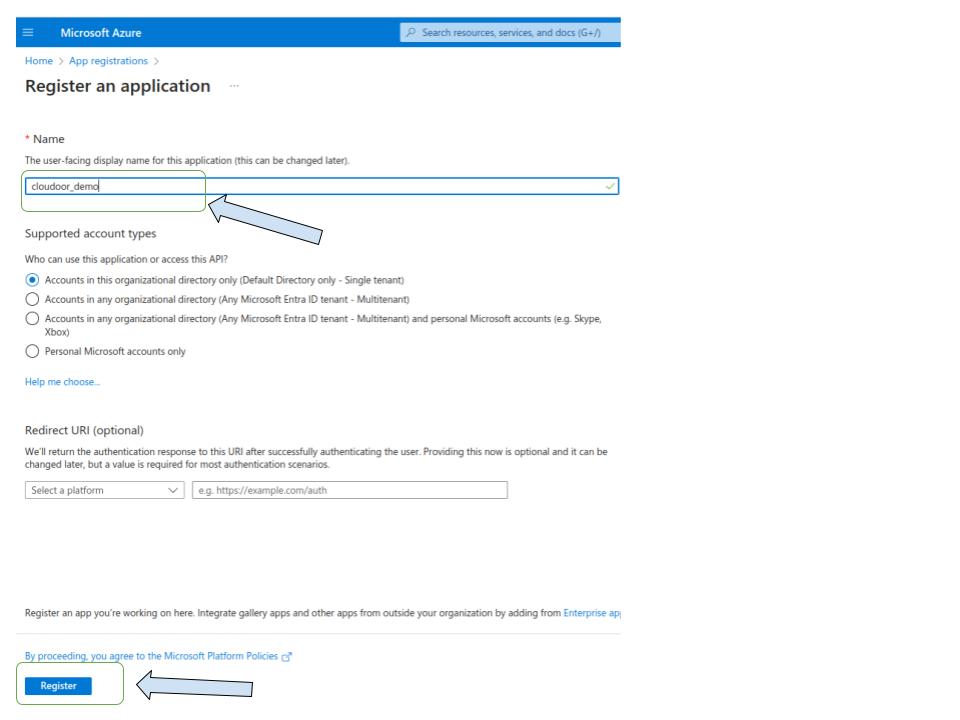
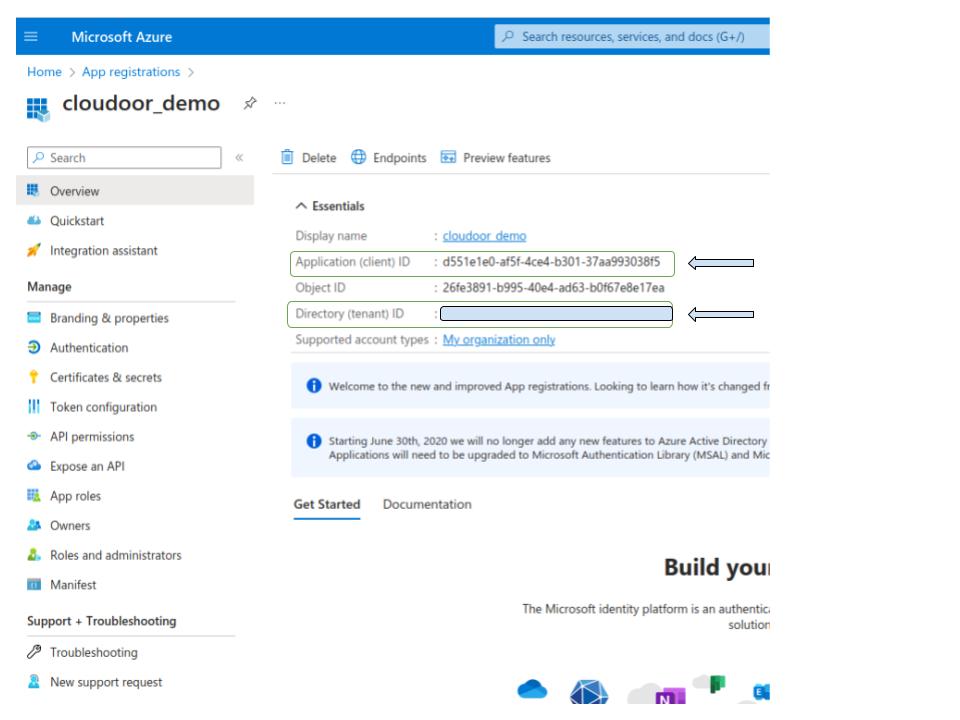
Fill in the form: enter the name of your app registration and leave the other settings as default, then click on "Register" to create your app registration.
You will be redirected to a view like the one shown, note the following information:
- Application (client) ID
- Directory (tenant) ID
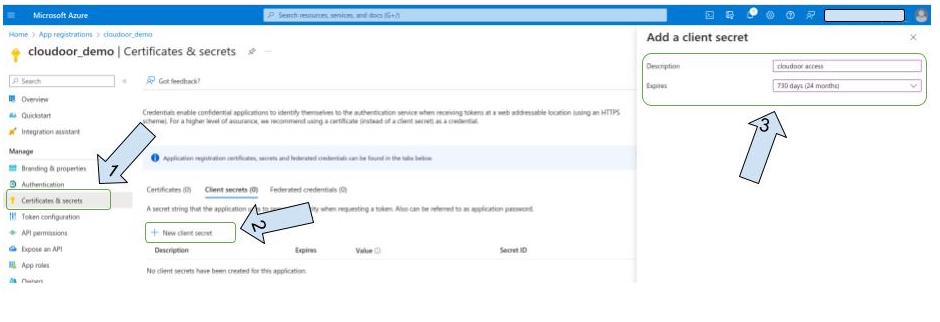
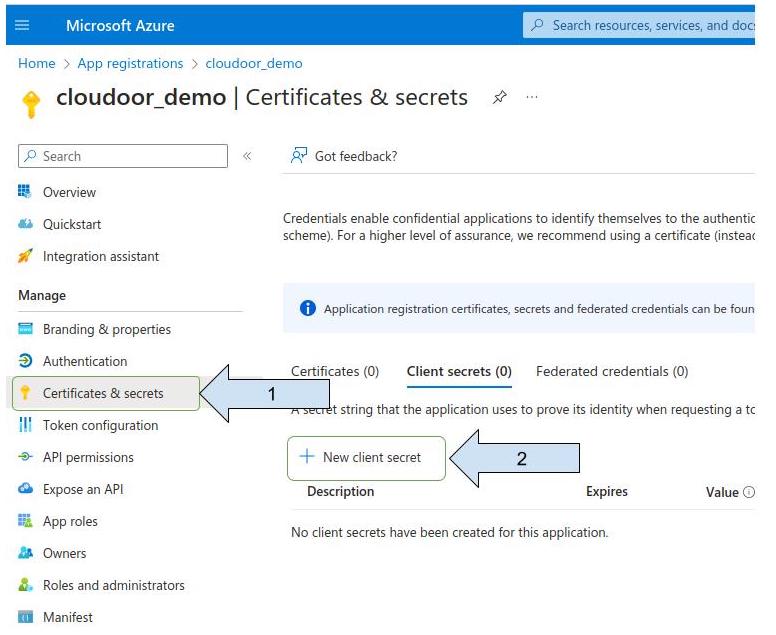
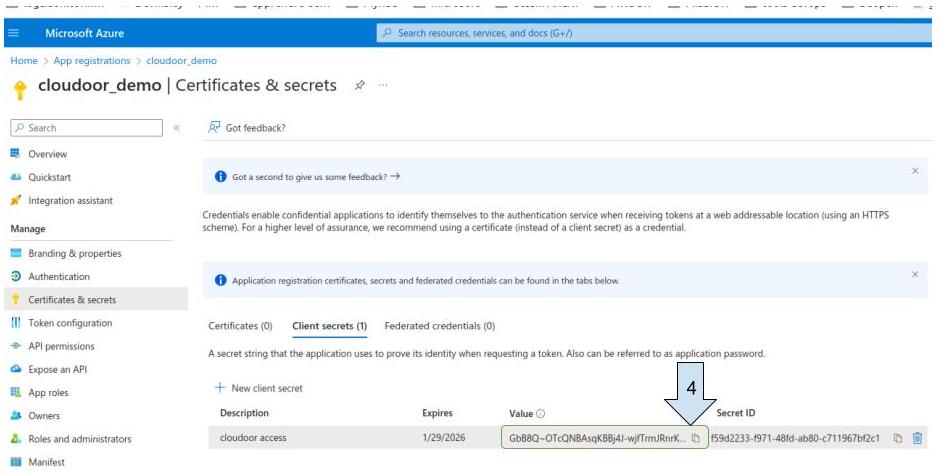
Create and retrieve the Client Secret
- Click on “ Certificate & secrets “
- Click on “ New client secret “
- Enter a description of your client secret
- Select expiration period
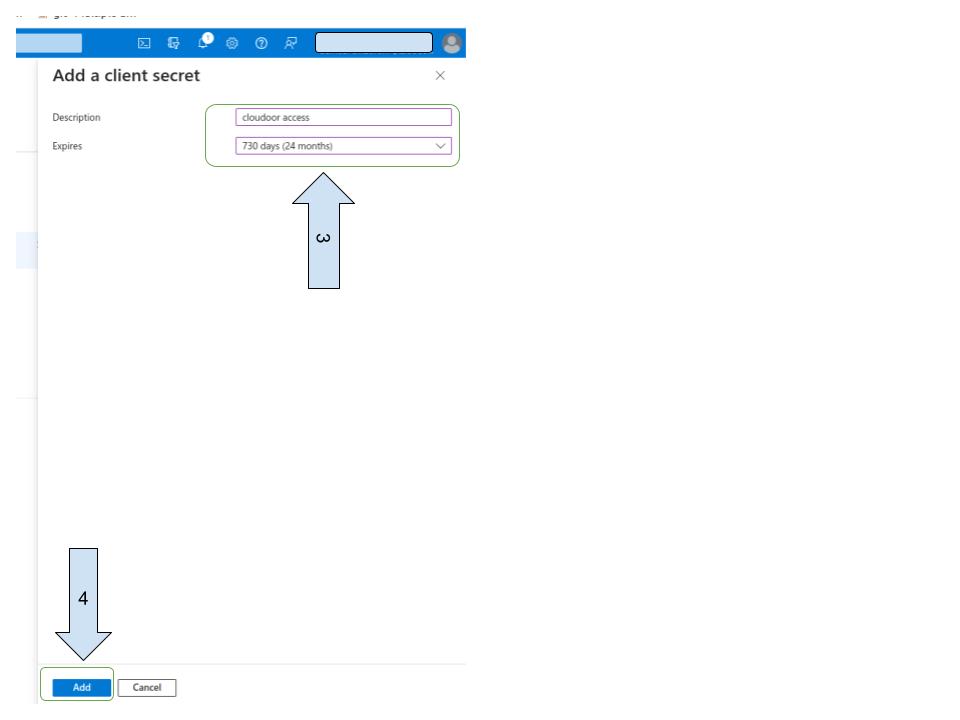
5- Retrieve the "client secret" (make a note of it, as it will no longer be visible after you exit this view)
At this level, we already have:
- Client ID = Application (client) ID
- Client secret
- Tenant ID = Directory (tenant) ID
Step 2
Assign the necessary permissions to our app registration and retrieve the subscription identifier ( Subscription ID )
enter “subscription“ on the search bar

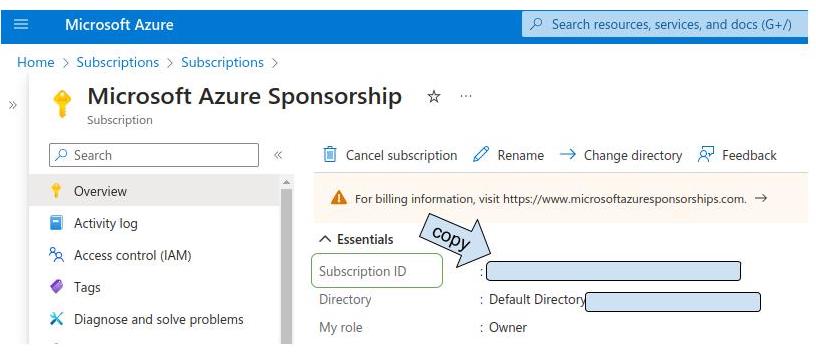
Choose your subscription and copy the subscription ID
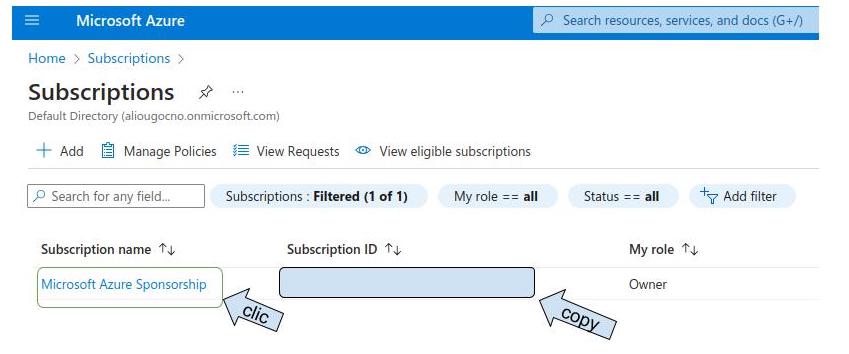
Copy subscription ID
At this point, we have all the information requested by cloudoor
- Client ID = Application (client) ID
- Client secret
- Tenant ID = Directory (tenant) ID
- Subscription ID
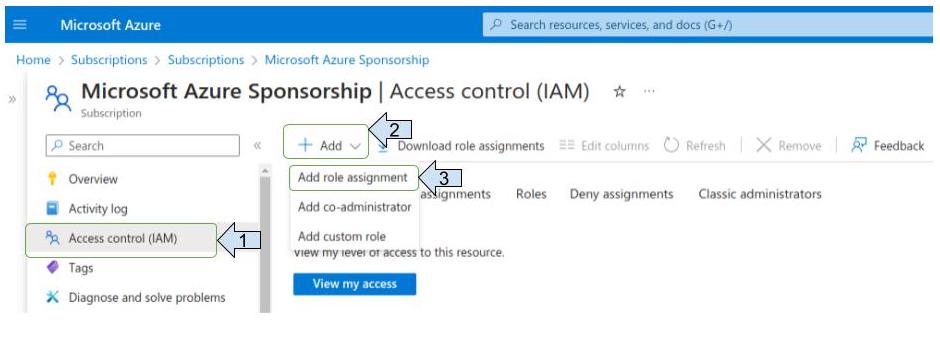
Assign permissions to the app registration previously created on the subscription
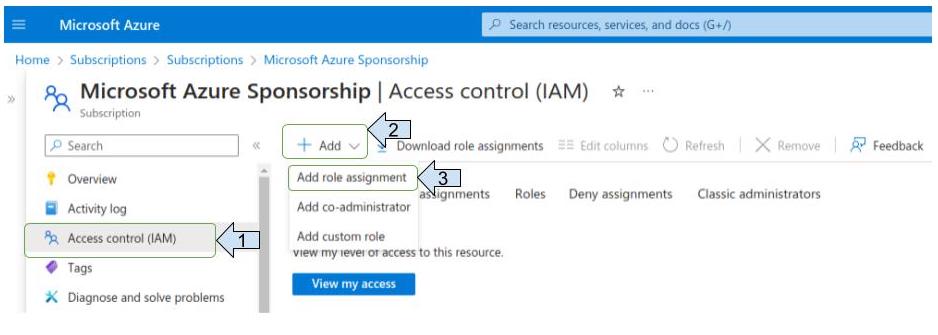
- Click on “ Access control (IAM) “
- Click on “Add”
- Click on “Add role assignment”
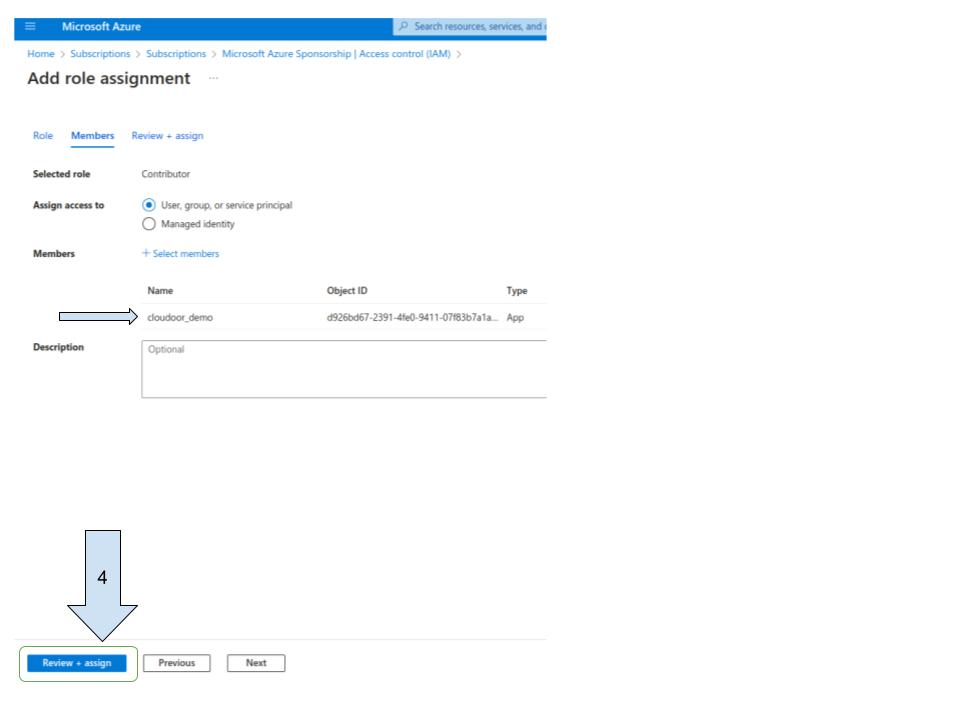
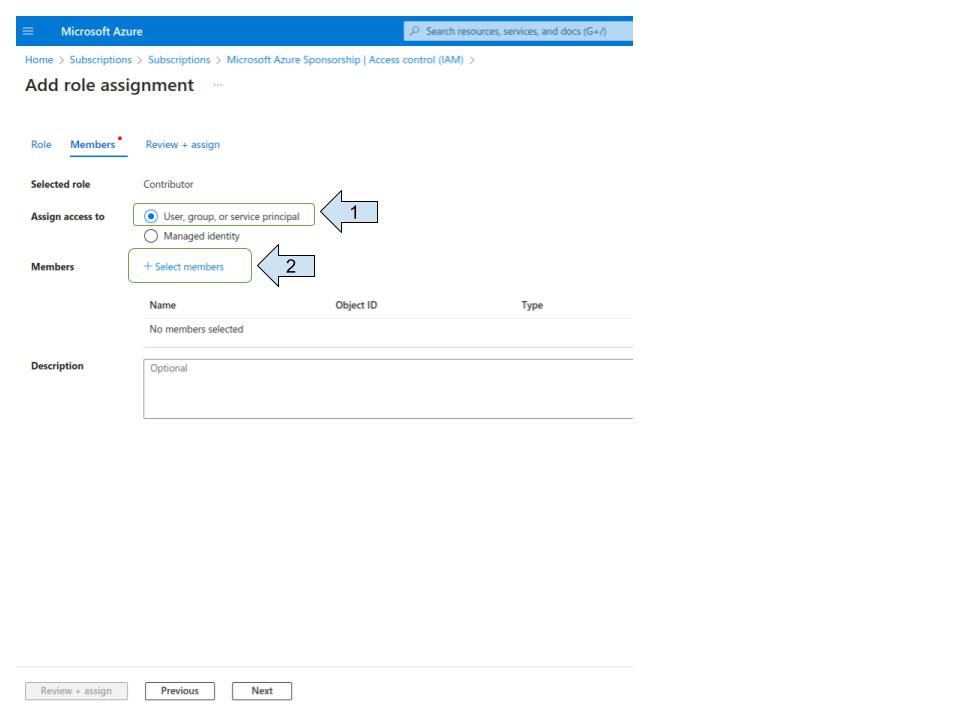
Assign the "contributor" role”
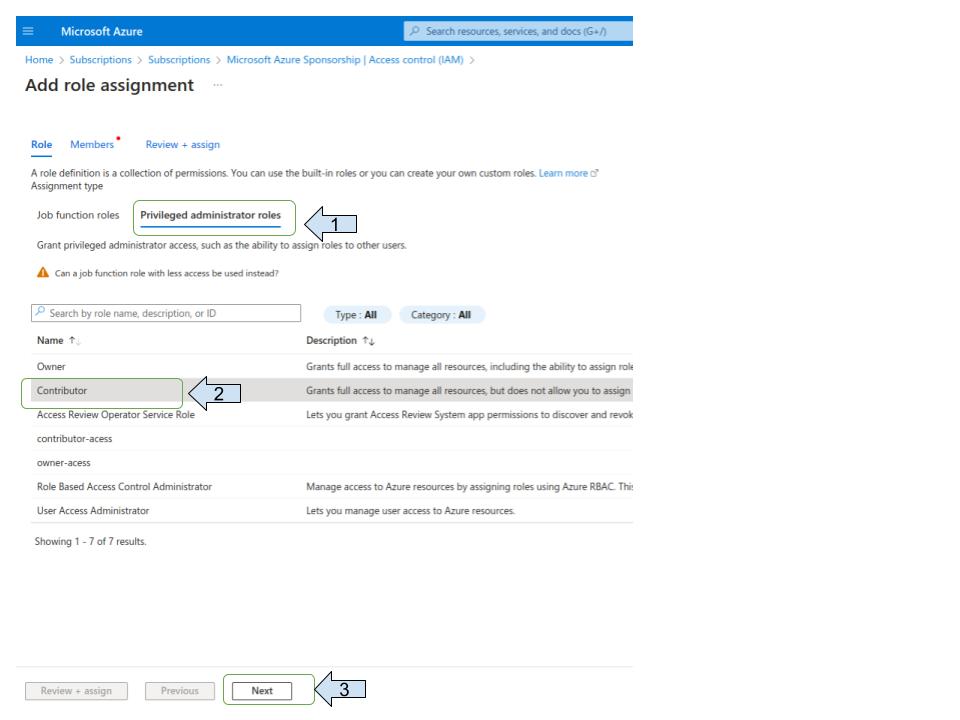
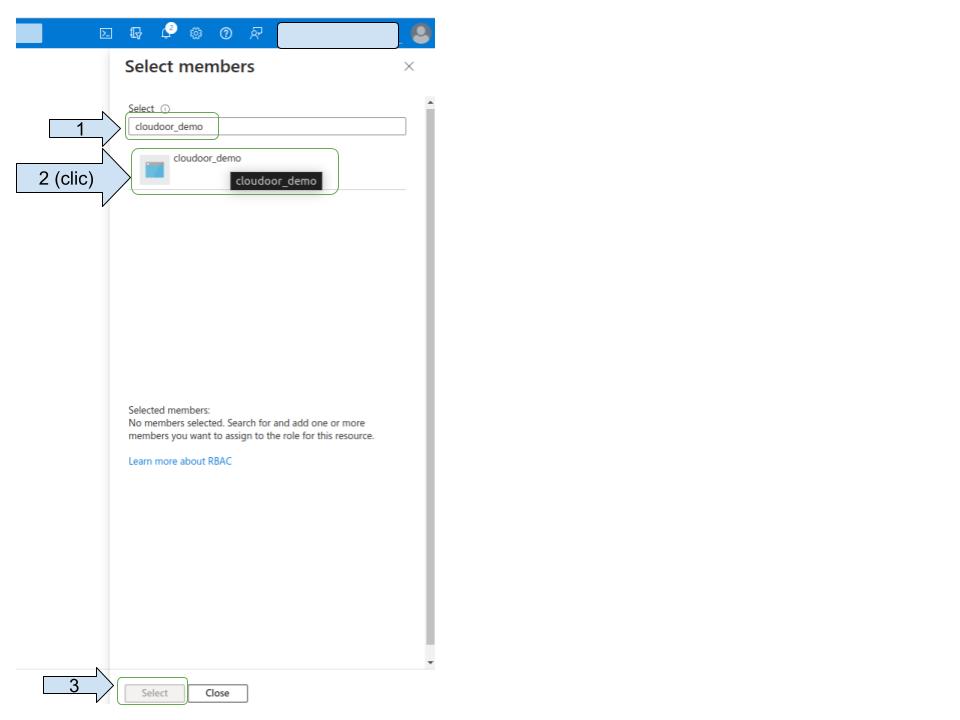
Select your app registration


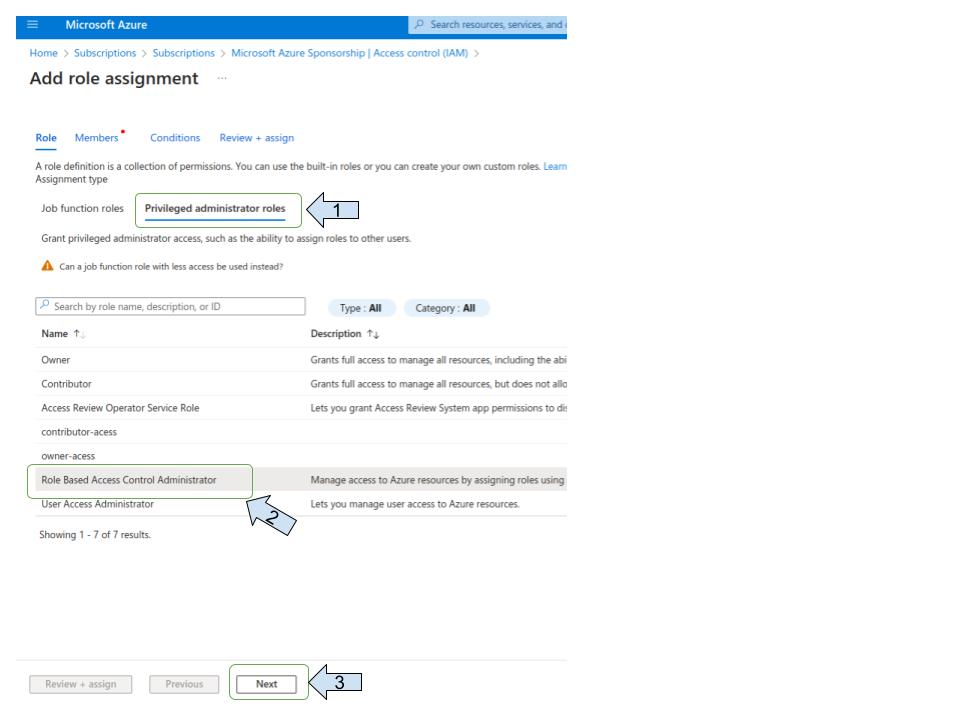
Assign “ Role Based Access Control Administrator” role

Step 3
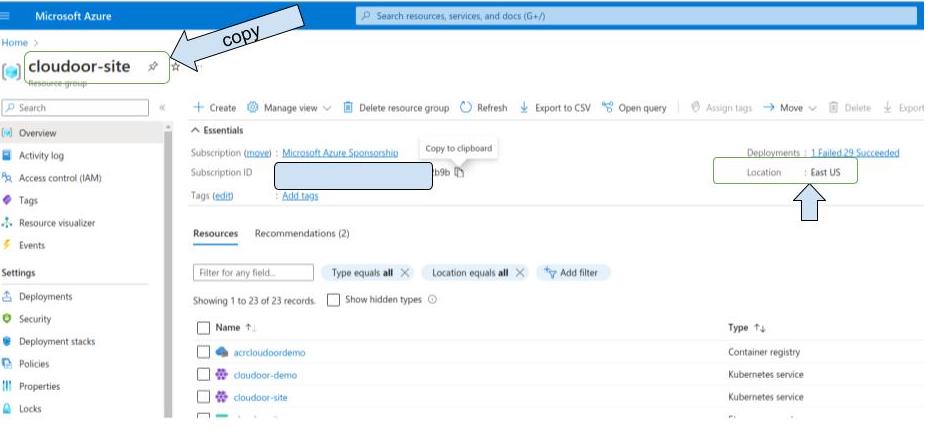
Retrieve resource group name
Enter "resources groups" on the search bar
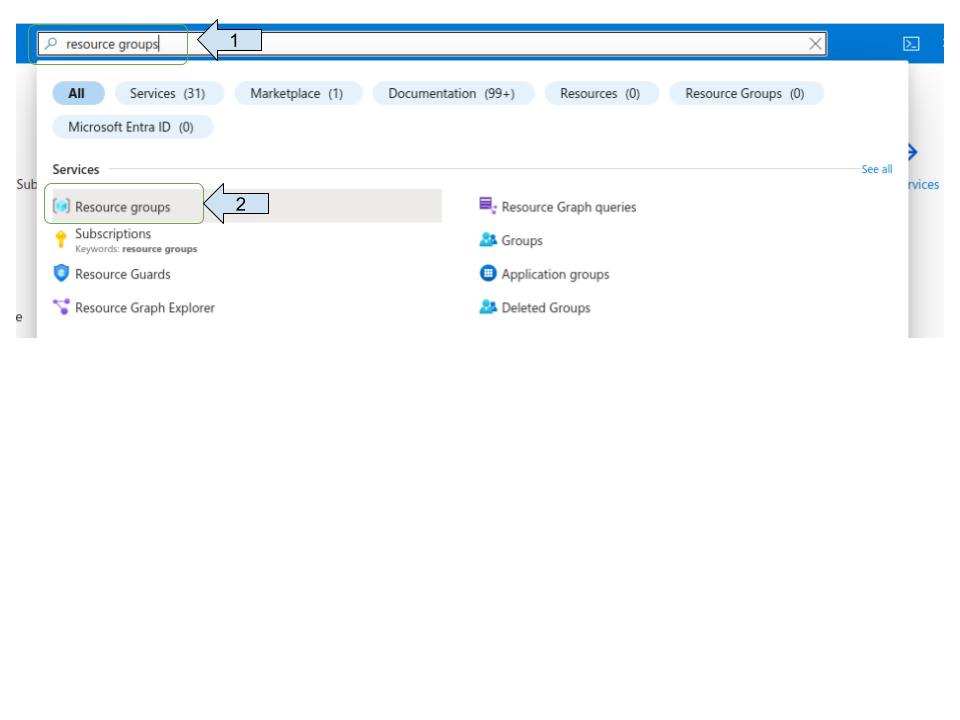
Select your resource group
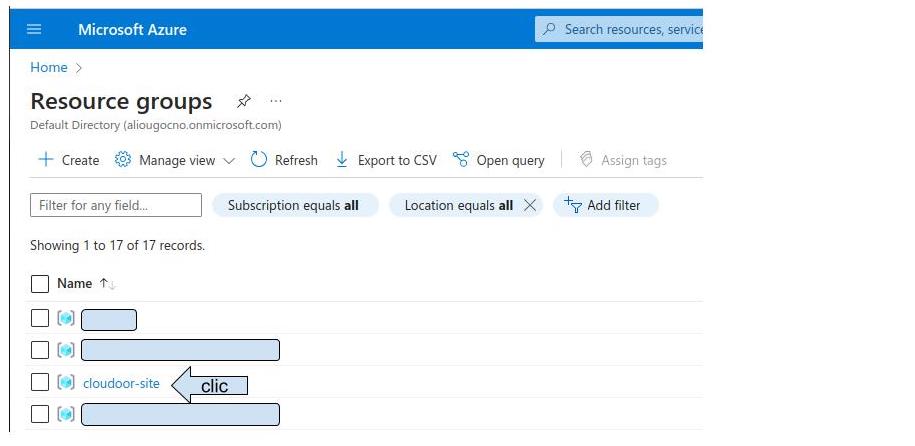
Copy the resource group name and its location
Step 4
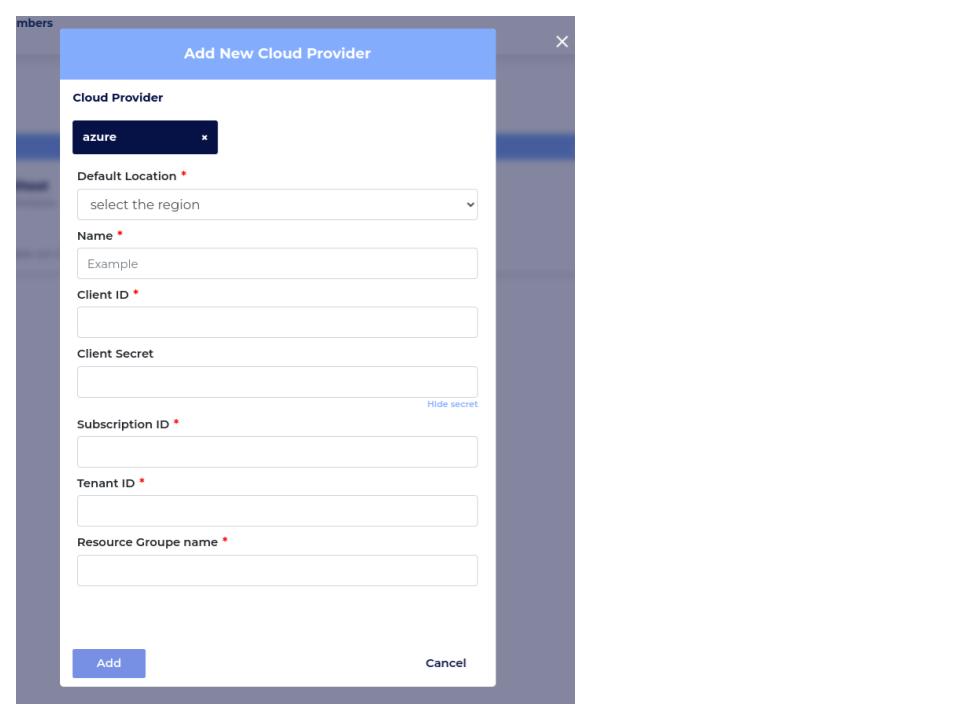
Fill in the cloudoor onboarding form with the information retrieved above
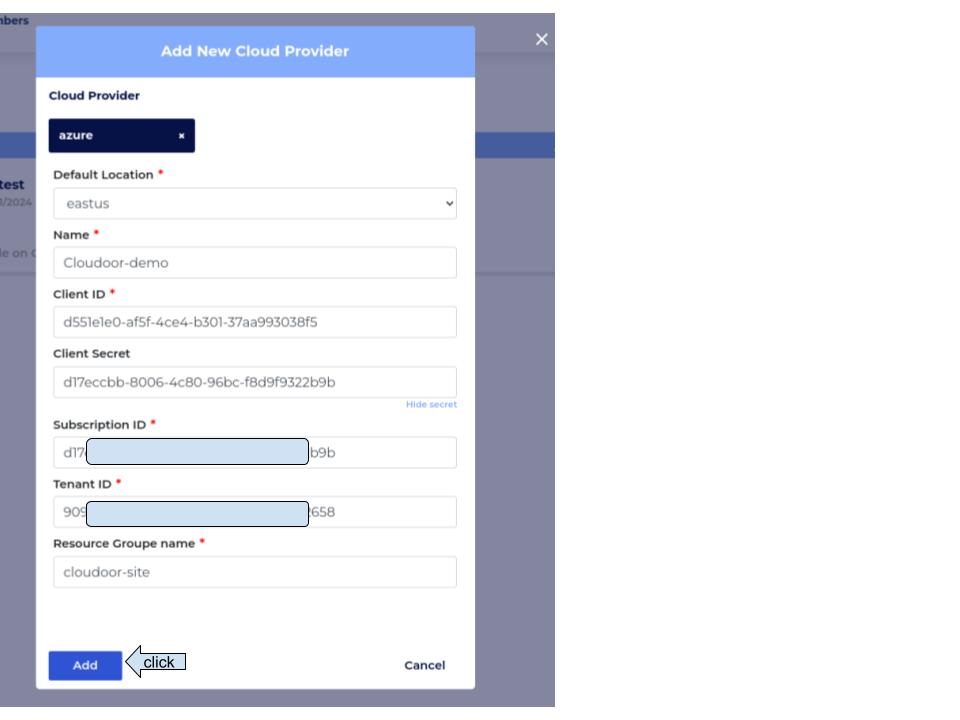
🎉 You have successfully onboarded your Azure cloud provider 🎉
GCP ( Google Cloud Provider )
How to get the Cloudoor form information?
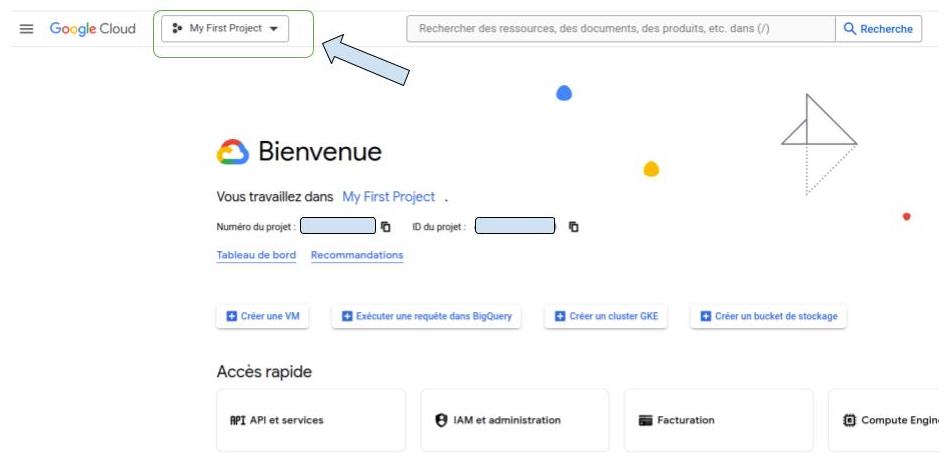
Step 1
Log in into your google portal and select your project
Step 2
Create a service account with the owner role on the project
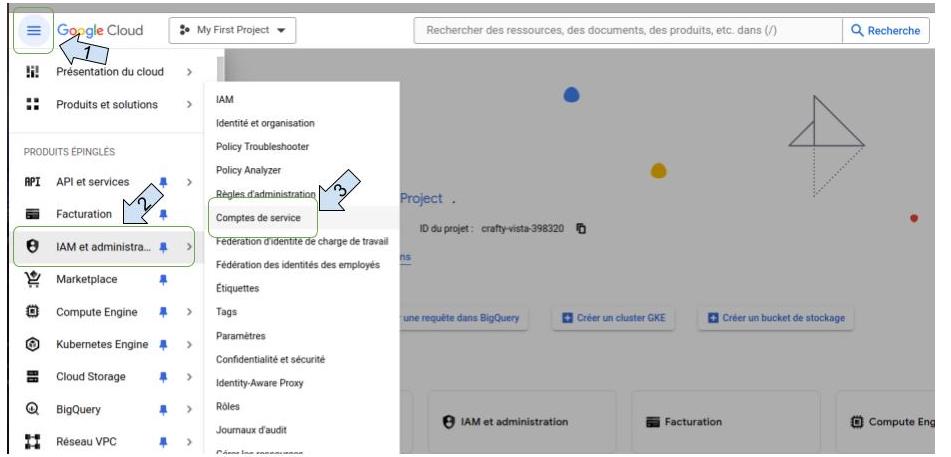
- Click on the menu on the left
- Click on “ IAM and administration “
-
Click on “ service accounts “ xxx
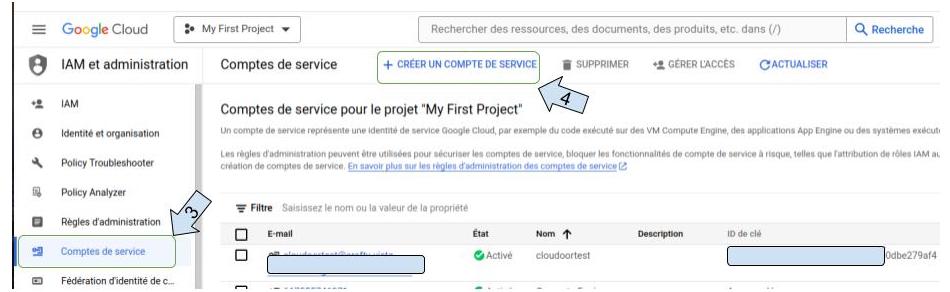
-
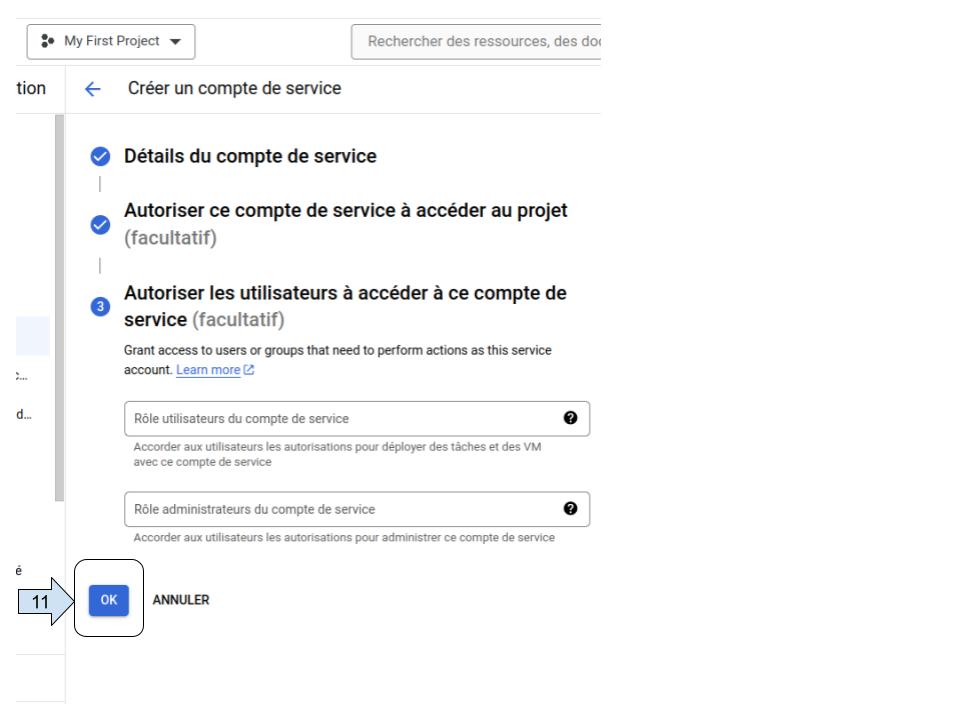
Click on “ create service account “
- Write the service account name.
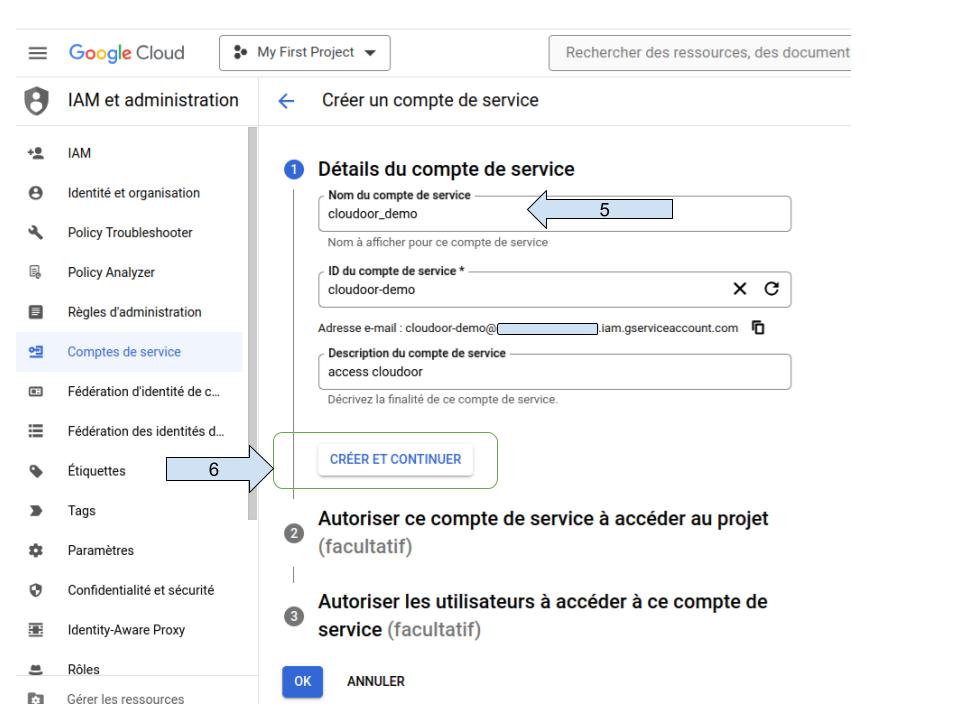
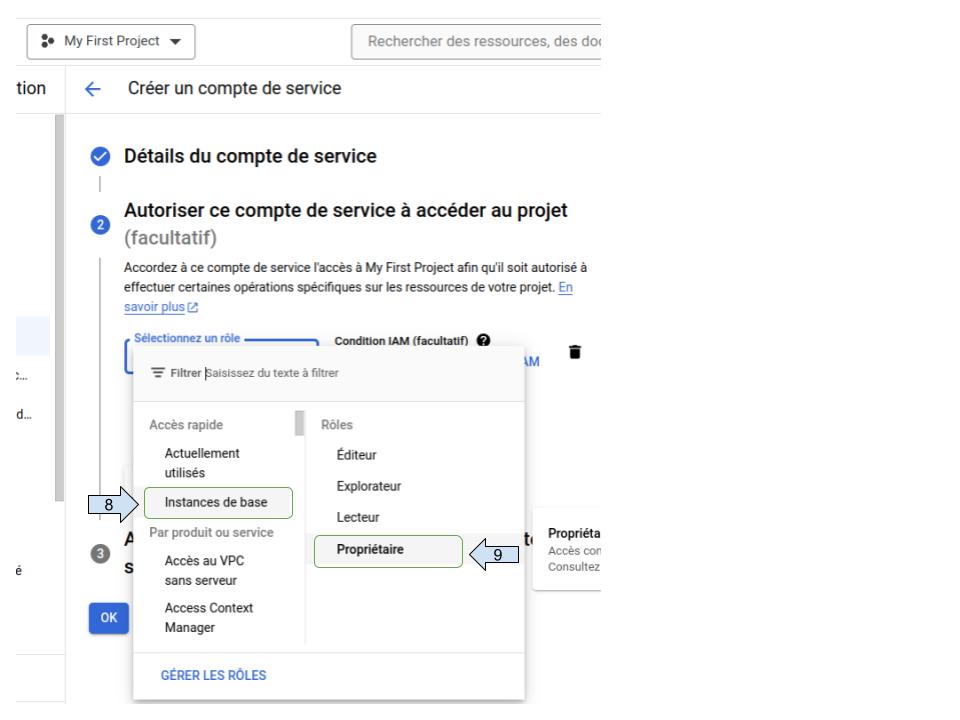
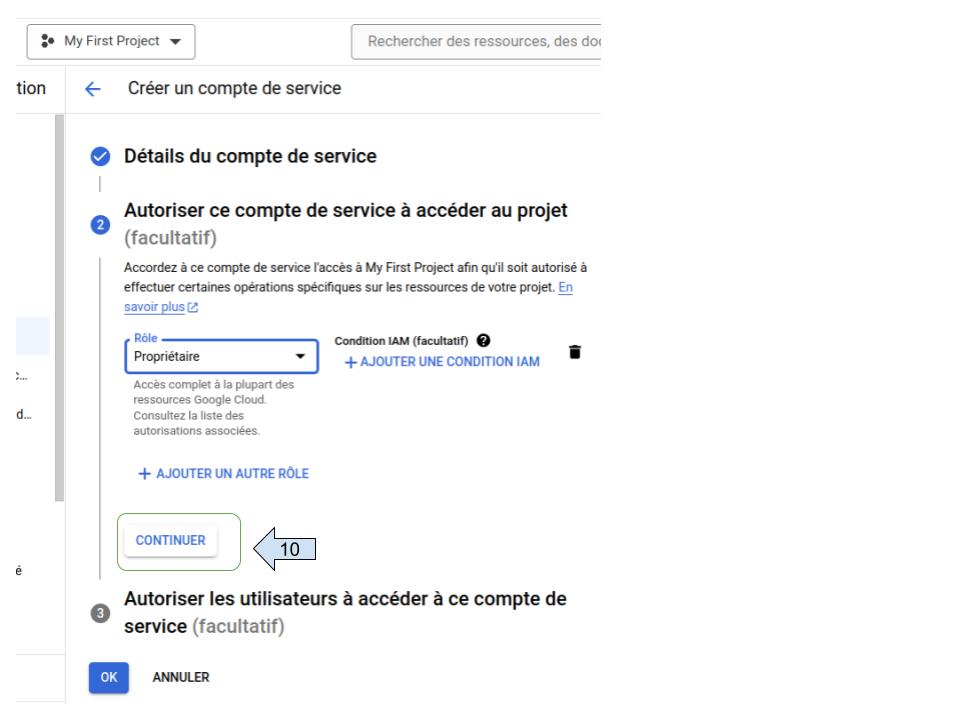
- Assign permissions to your service account
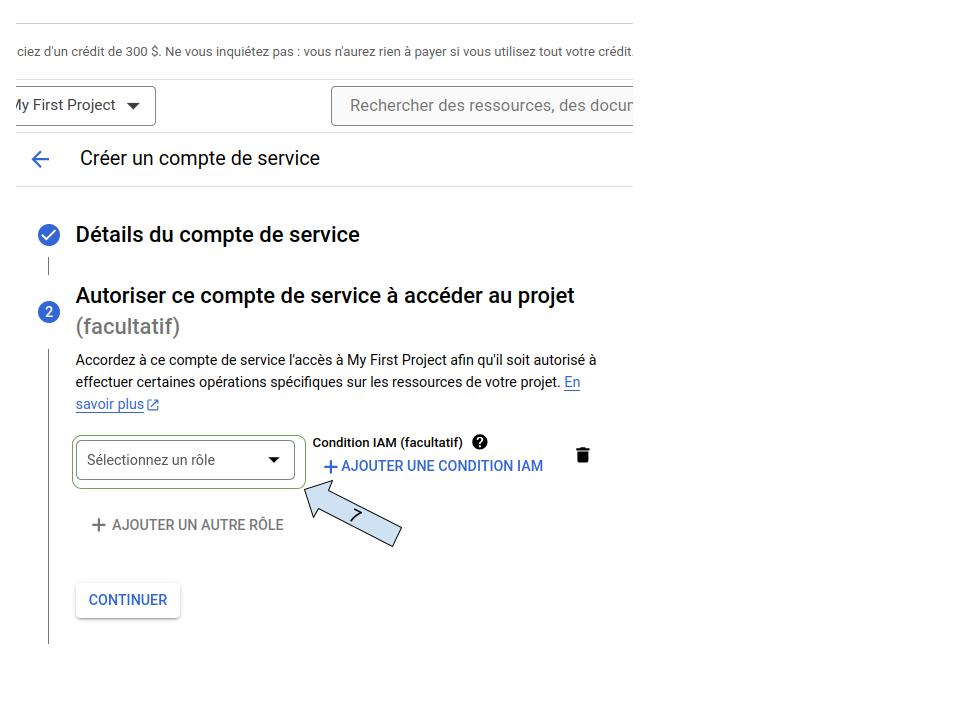
- Select “owner” role to your project.
Step 3
Create and download a service account access key
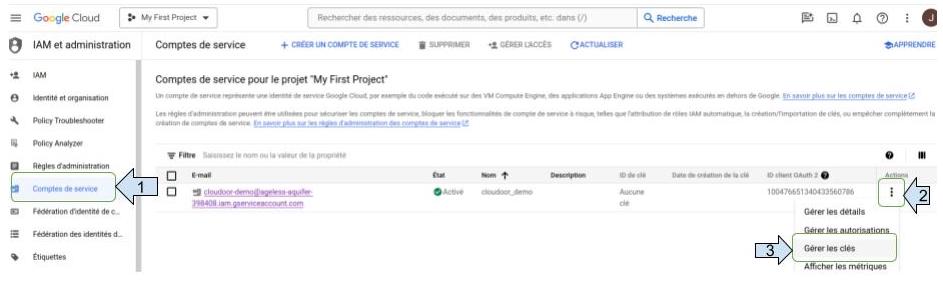
- Click on service accounts.
- Select the service account created and click on the three-dot icon under "action".
- Select “ manage keys “.
- Click on “ create key “
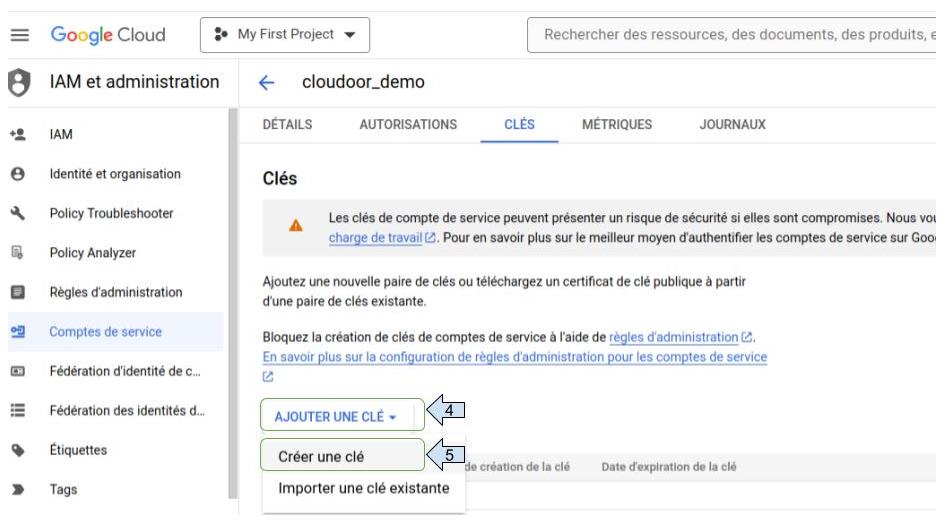
- Select “ json”
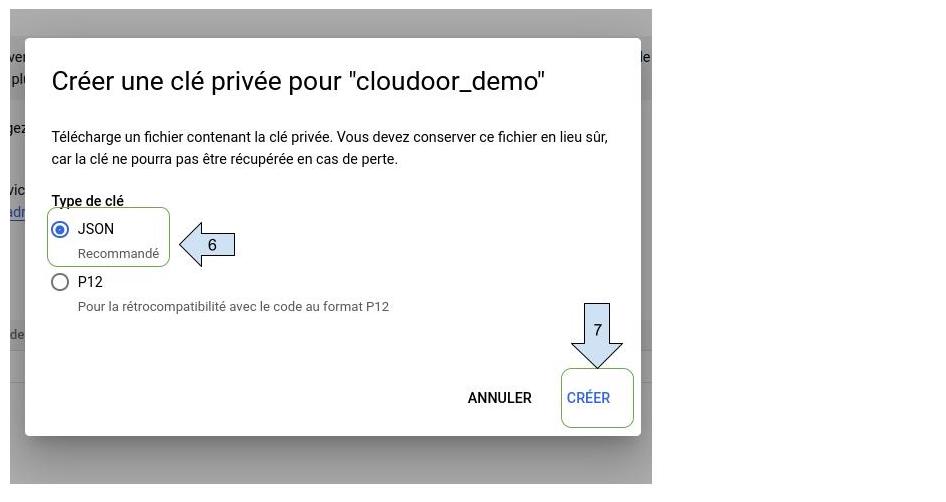
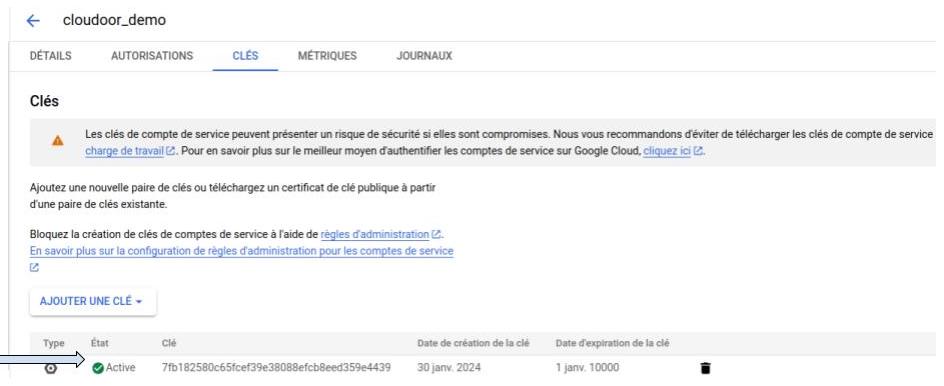
- After clicking on "Create", the private key will be downloaded to your computer.
- The key created will appear in the service account view
Step 4
Find the location of the created private key
Find the location of the private key on your computer
- Click on the download icon in your browser and click on "open in folder" In my case, the file is in the "Download" folder

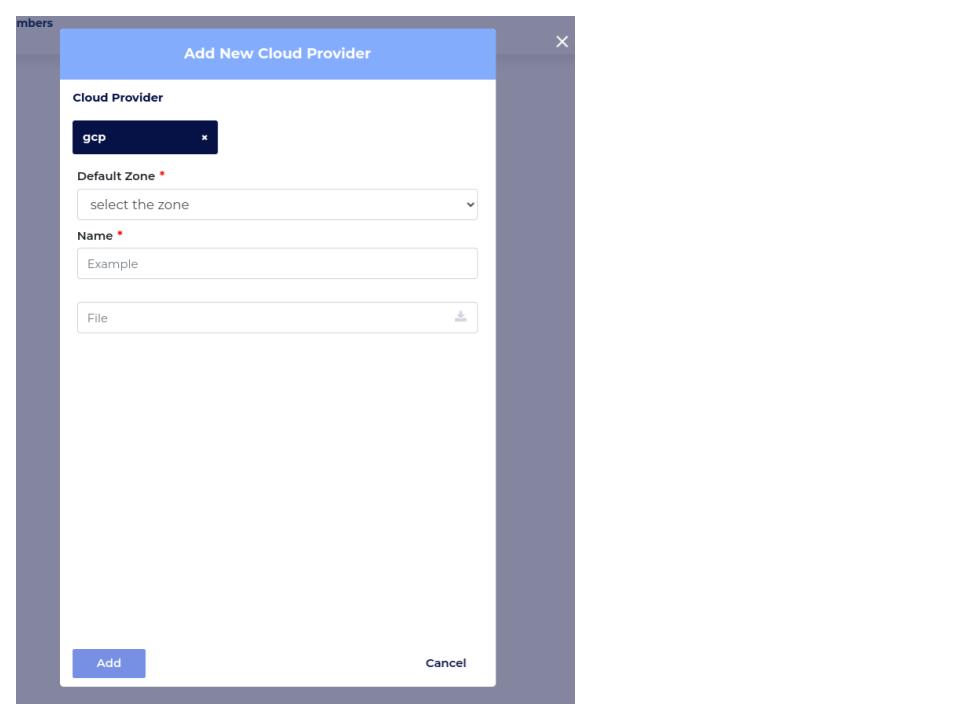
Step 5
Fill in the cloudoor form.
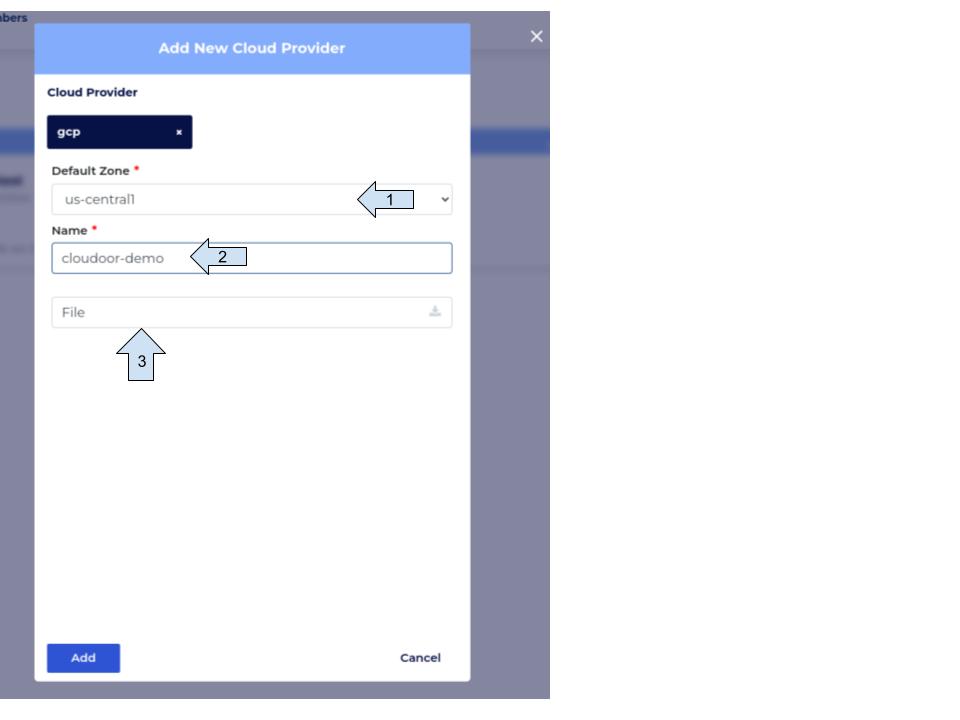
- Select the region where the infrastructure is or will be deployed
- Write your organization name
- Click on the "File" field and choose the private key we created above. My key is placed in my "Download" folder, just choose the key's location on your computer.
- Click "Add"
🎉You have successfully onboarded your GCP cloud provider🎉
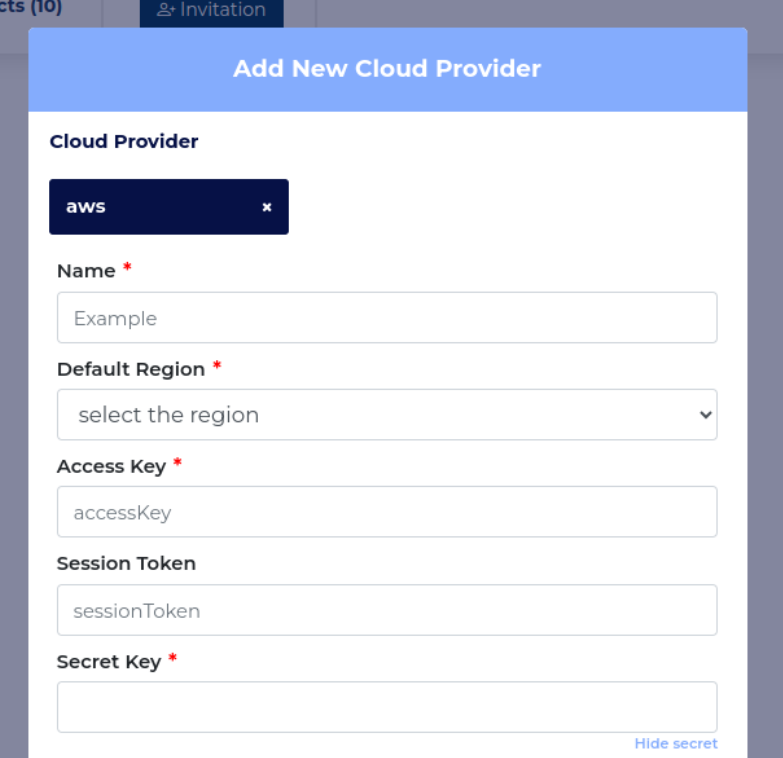
AWS (Amazon Web Service)
How to get the information for this form ?
Step 1
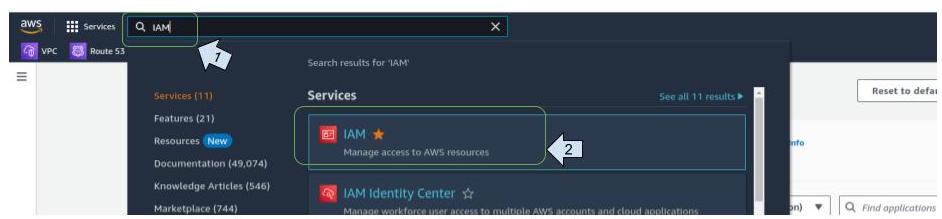
Log on to the AWS portal and create a user with the necessary permissions
- On the service search bar, enter "IAM" and click on the service
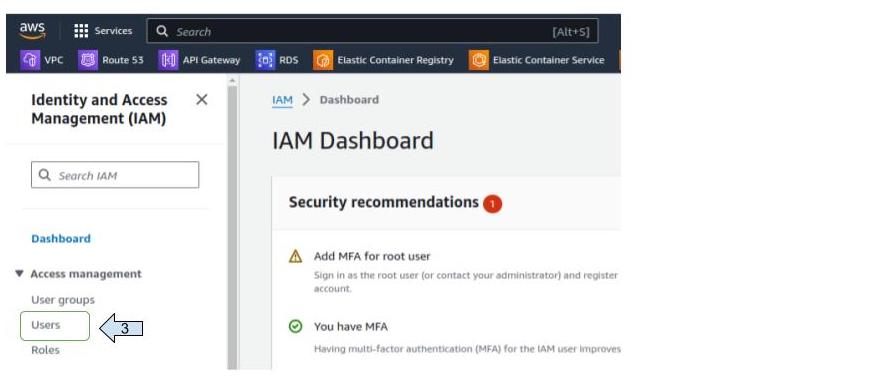
- On the new view, click on "users" then on "create user"

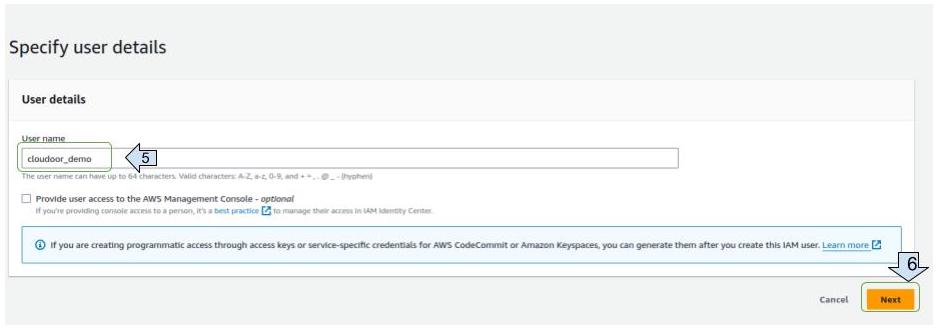
- Write the user name and click on "next"
- Assigning authorizations for accounts with no EKS clusters:
Click on “ Attach policies directly “
Enter “administratorAcces” on search bar.
Select “administratorAccess” policies
Click on “ Next “ 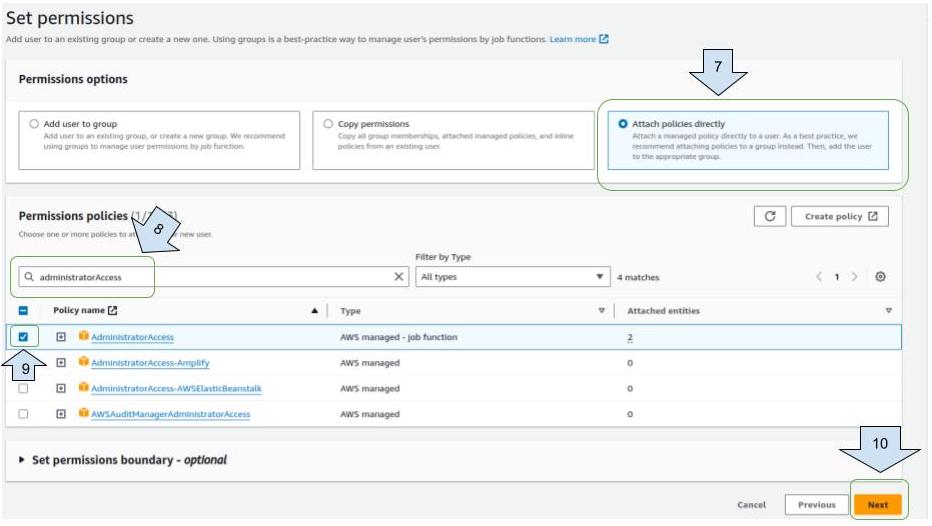 Click on “ create user”
 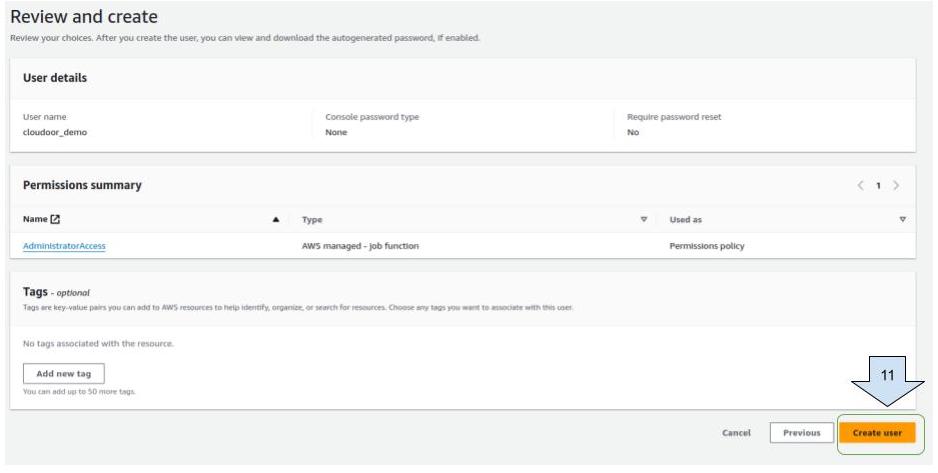 5. Assigning permissions for accounts with EKS clusters already deployed:
Click on “ Attach policies directly “.
Enter “ EKS” on search bar.
Select “ AmazonEKSClusterPolicy “, “AmazonEKSServicePolicy” 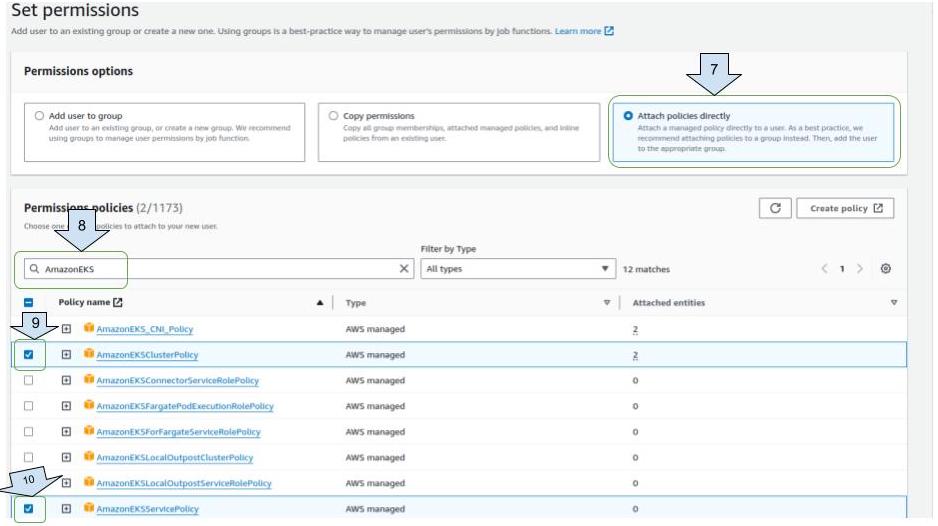
Click on “ next “
Click on “ create user” 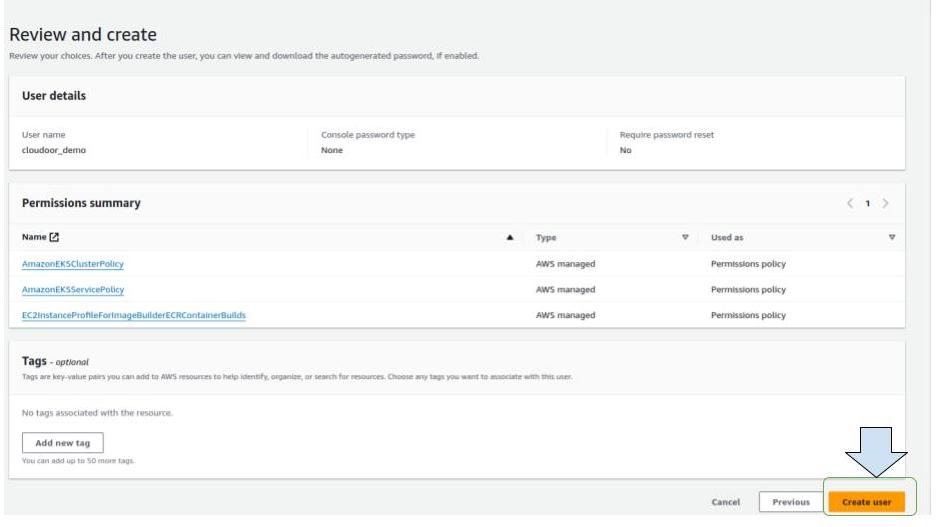
Step 2
Generate this user's access keys
- Click on the created user.
 2. On the new view, click on "Security credentials" then scroll and click on "Create access key".
 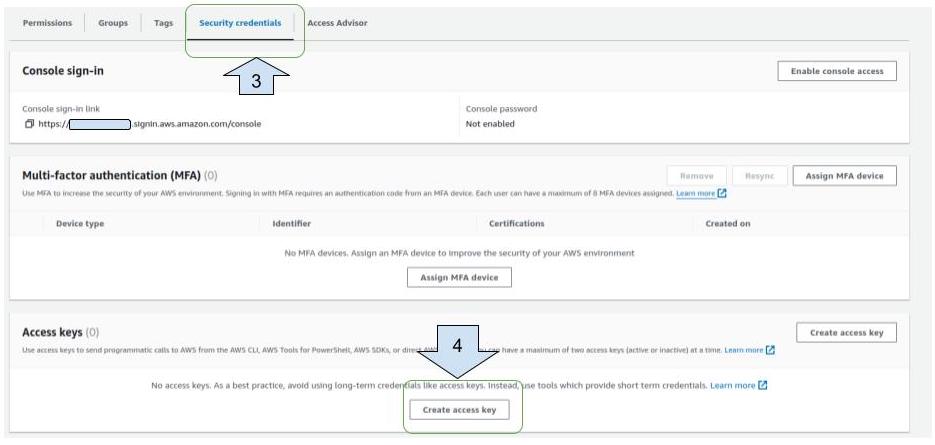 3. Select “Application running outside AWS” then click "Next".
 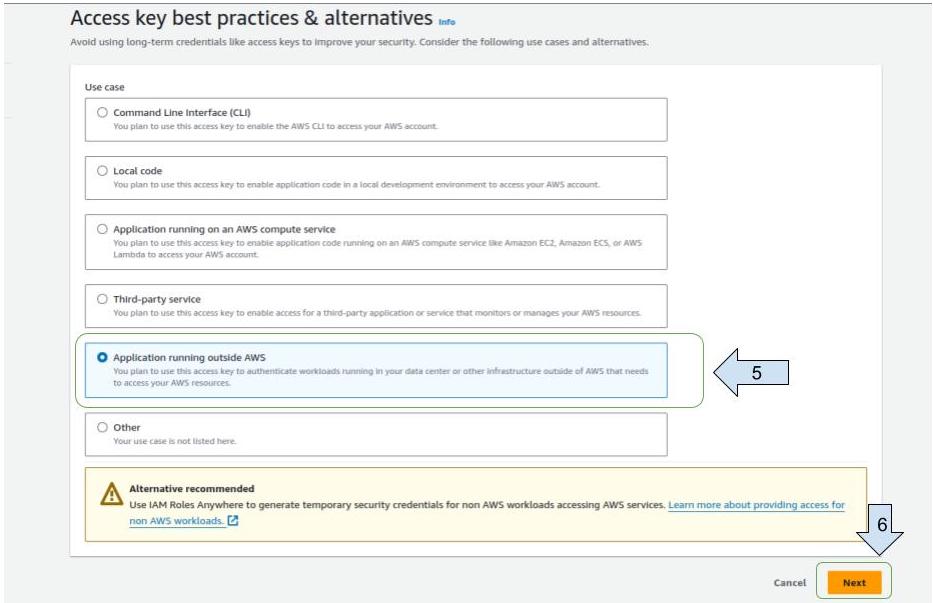 4. Write a description (optional) 5. Click on “Create access key “
 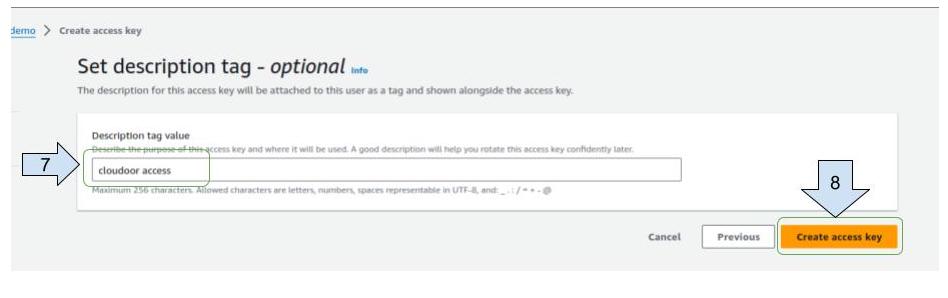 6. Copy and save somewhere, the access key and secret key that will be used in the "aws cloud" form.
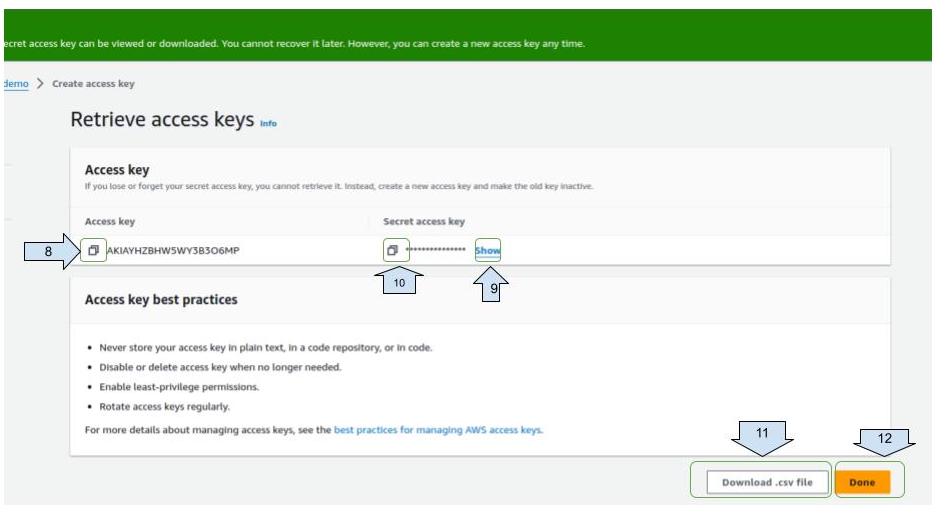
Step 3
Create a Policy and grant your created user access to it.
- Head back to your IAM dashboard and choose "Policies". Click "Create Policy" on the top right corner.

- In the "Policy Editor", click "JSON".

- Paste this JSON code:
- Click "Next"
- Write any name, like "EKSPersonalPolicy-Cloudoor", and click "Create Policy"
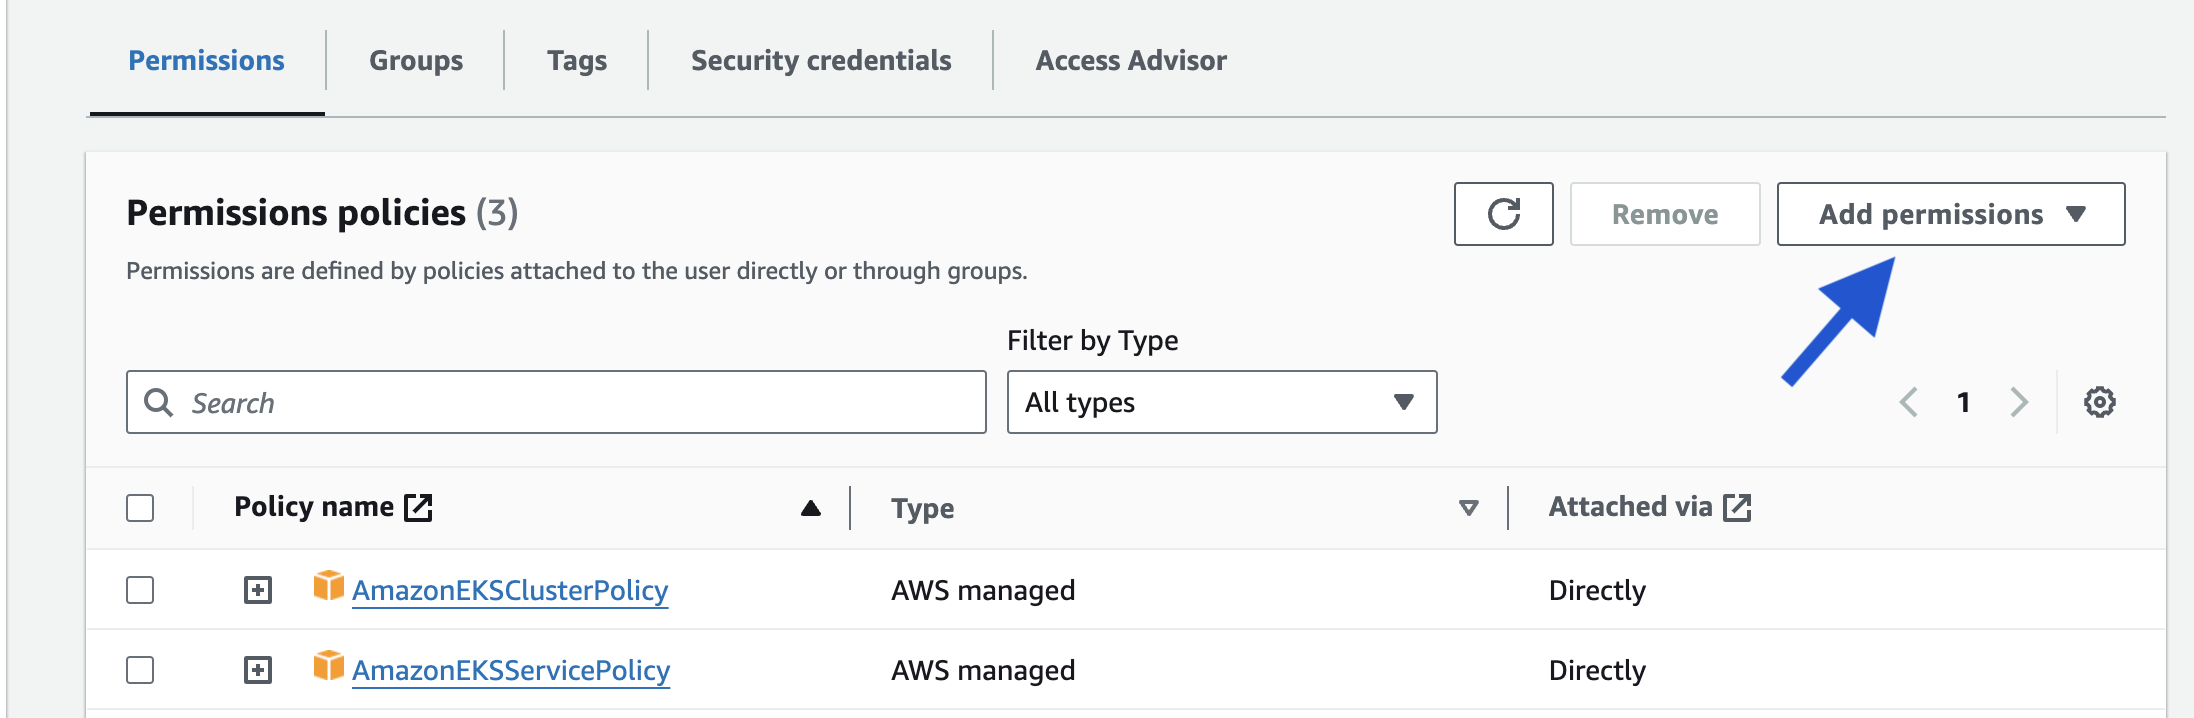
- Head on your IAM dashboard, find your created user, scroll down to "Permissions policies" and click "Add Permissions" on the right corner.
 7. Under "Permission Options", Choose "Attach policies directly". 8. Find your just created policy, possibly named "EKSPersonalPolicy-Cloudoor".
 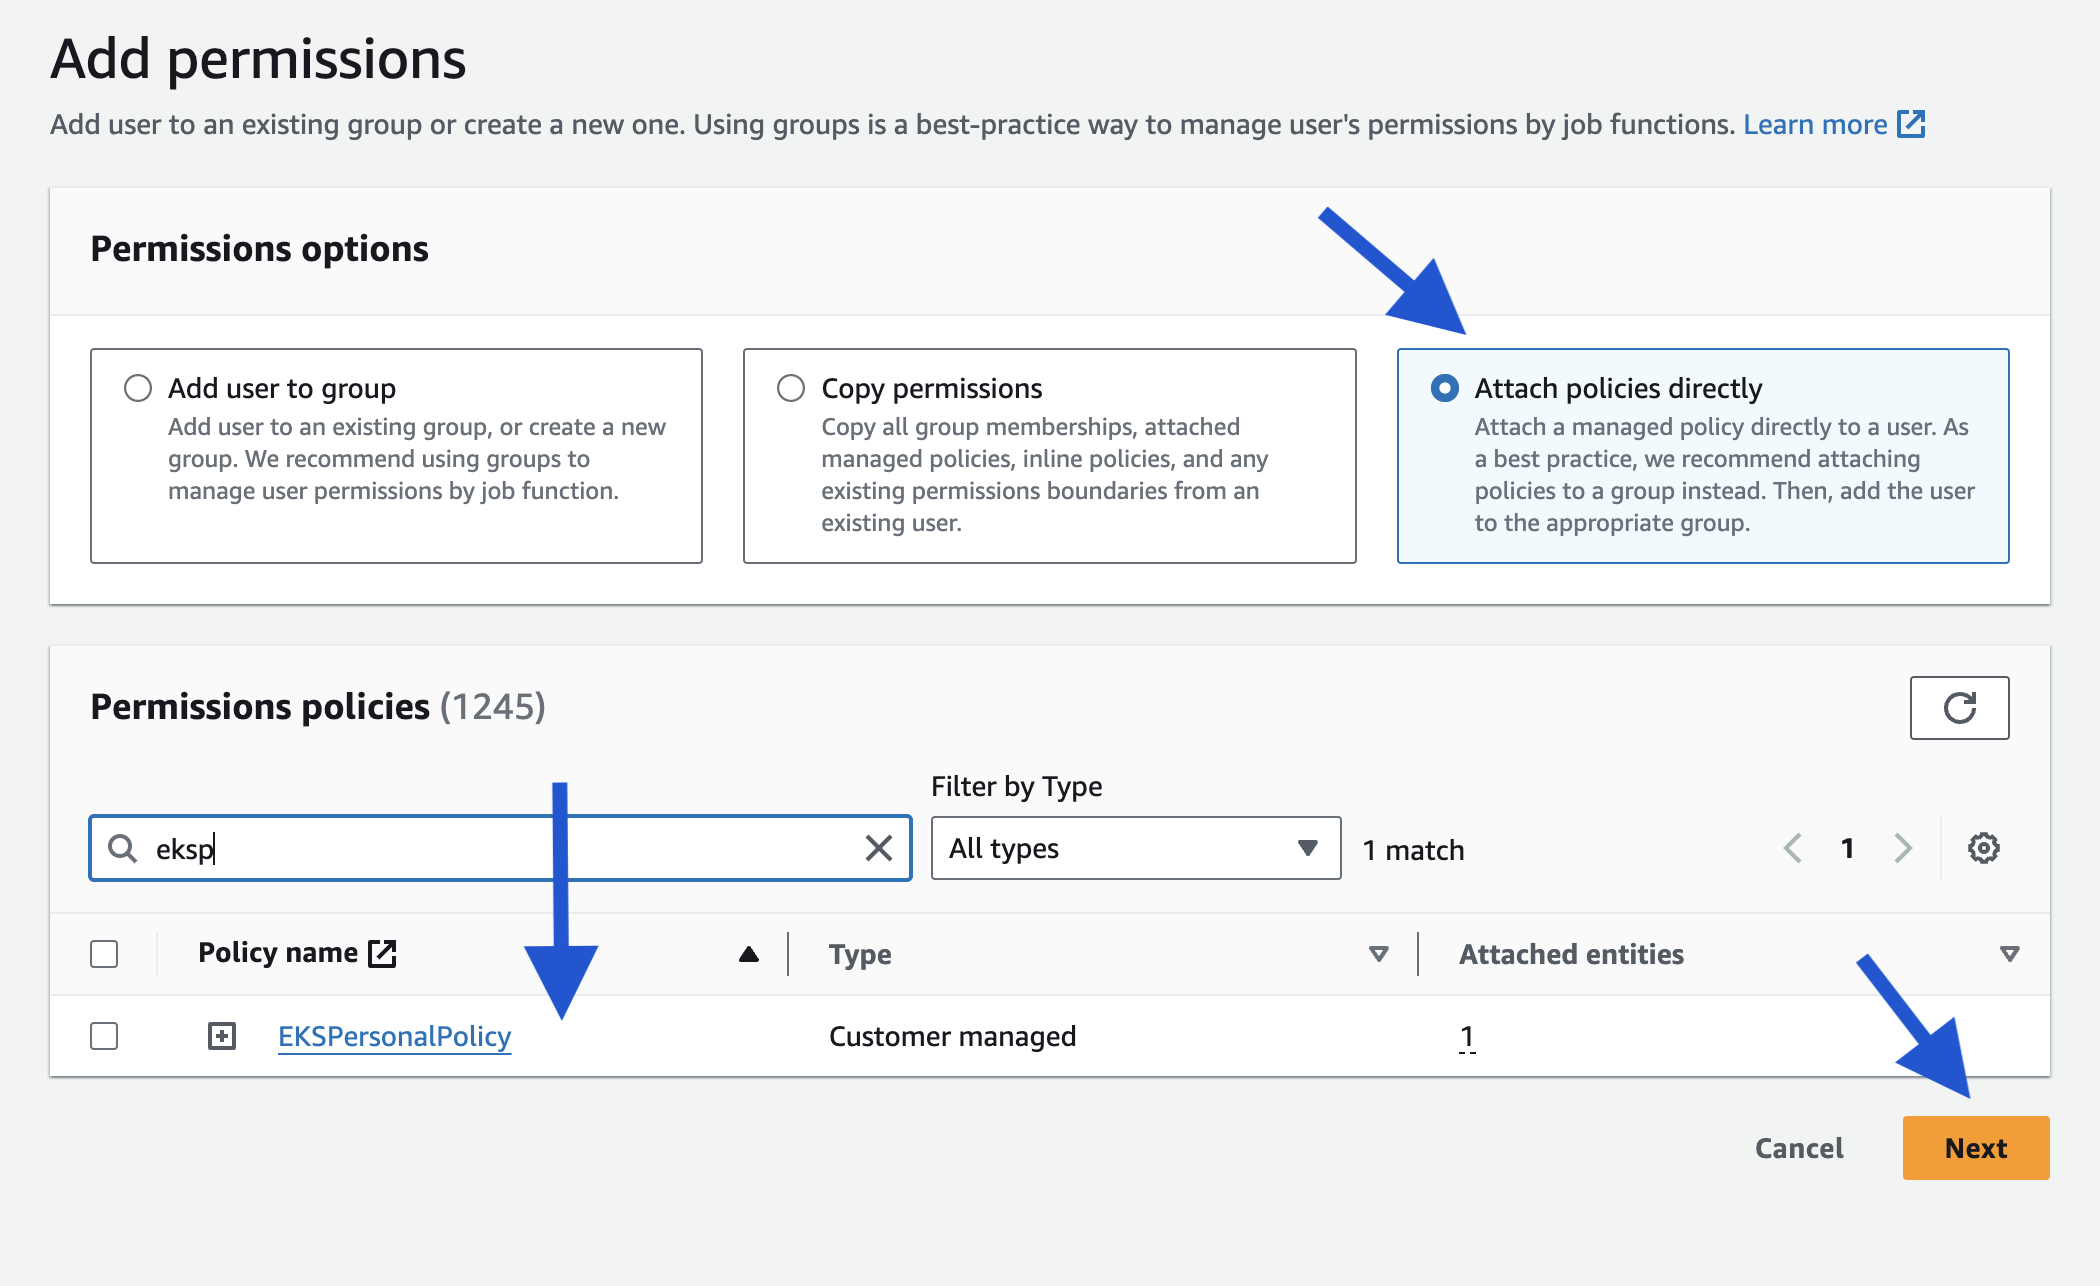 9. Click "Next" then click "Add Permissions"
Step 4
Grant your created user access on the cluster.
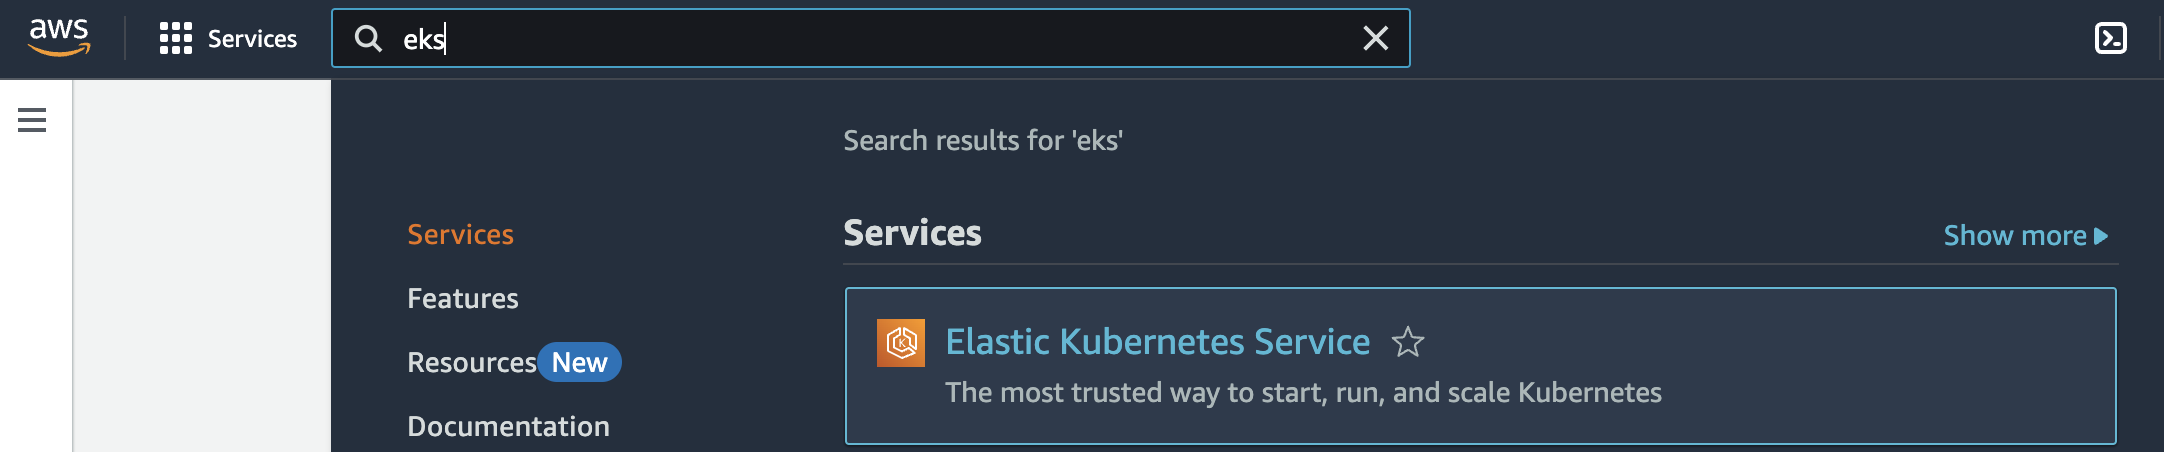
- On the service search bar, enter "EKS" and click on the service
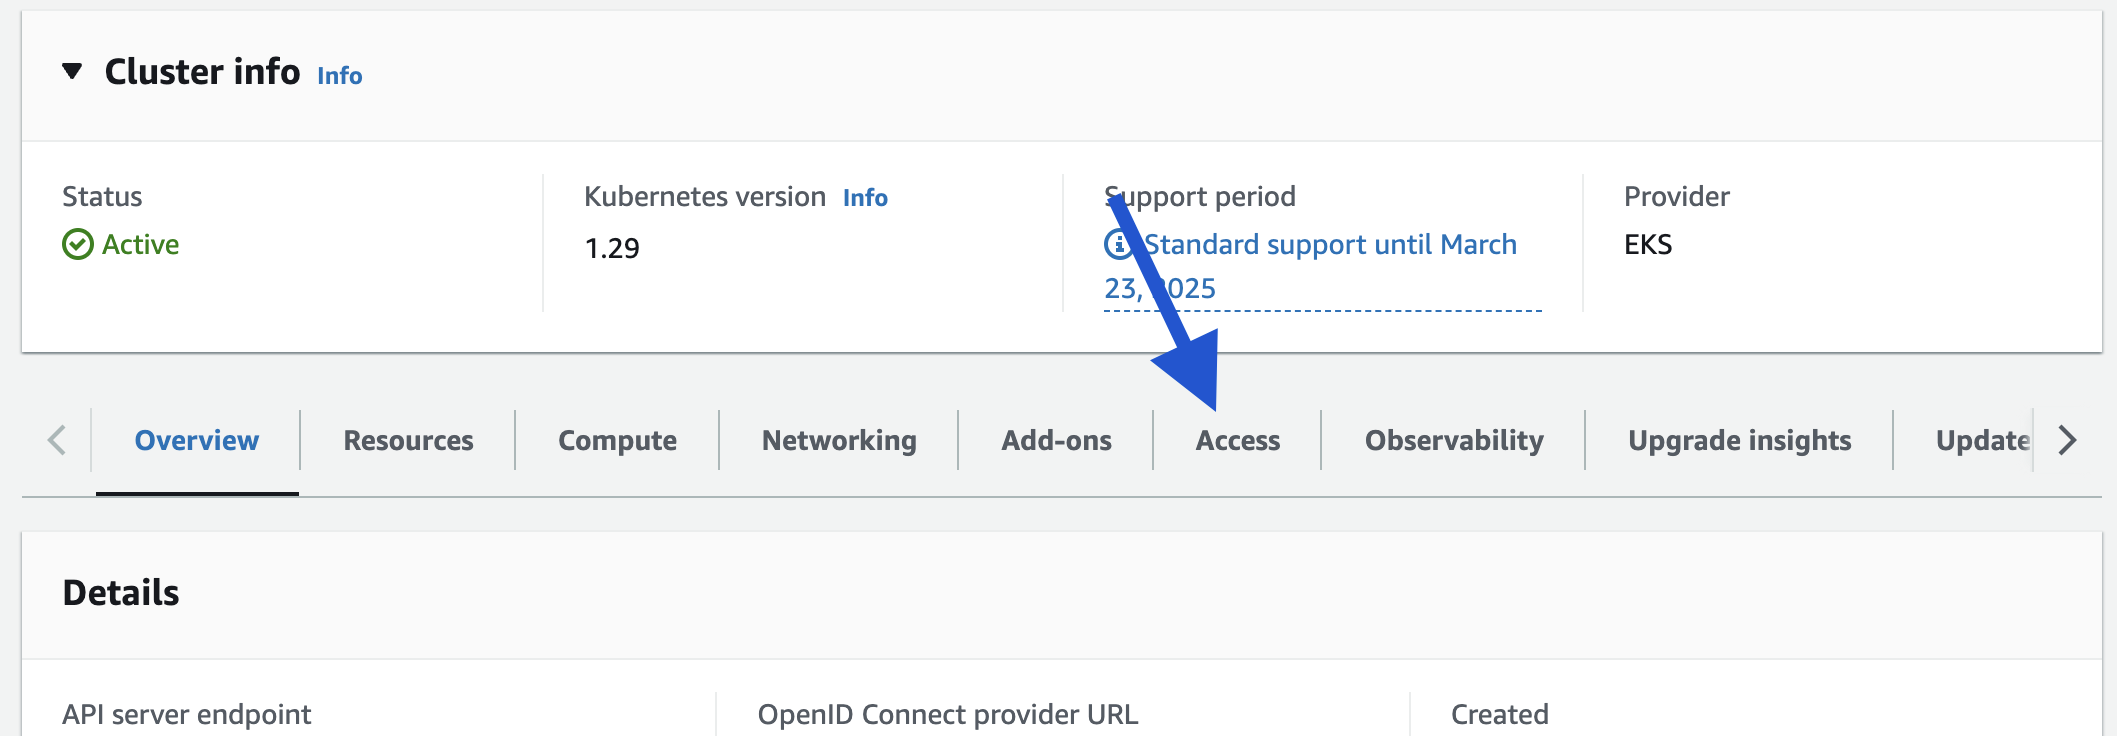
- Choose the correct region of your cluster, then click your cluster.
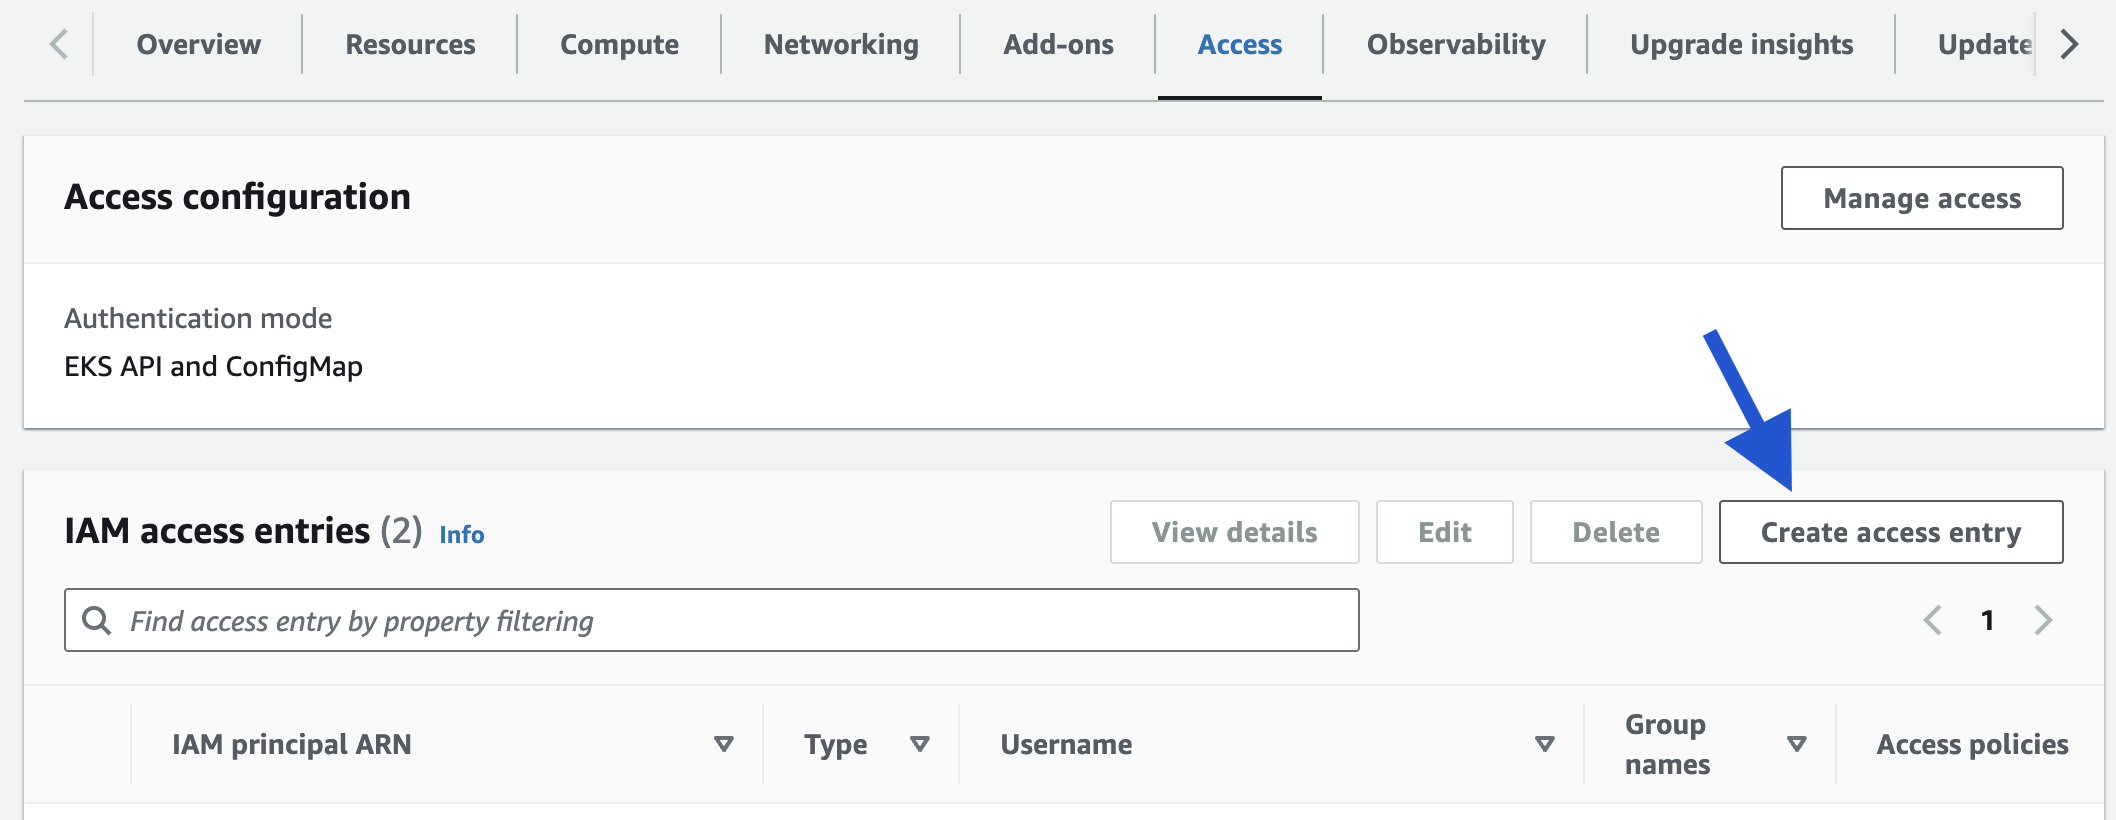
- Scroll down and click on "Access"
- On the "IAM access entries", click on "Create Access Entry"
- In "IAM principal ARN" search for our just created user and choose it.
- On "Type", choose "Standard" and give a username to the entry. Maybe something like cloudoor-user.
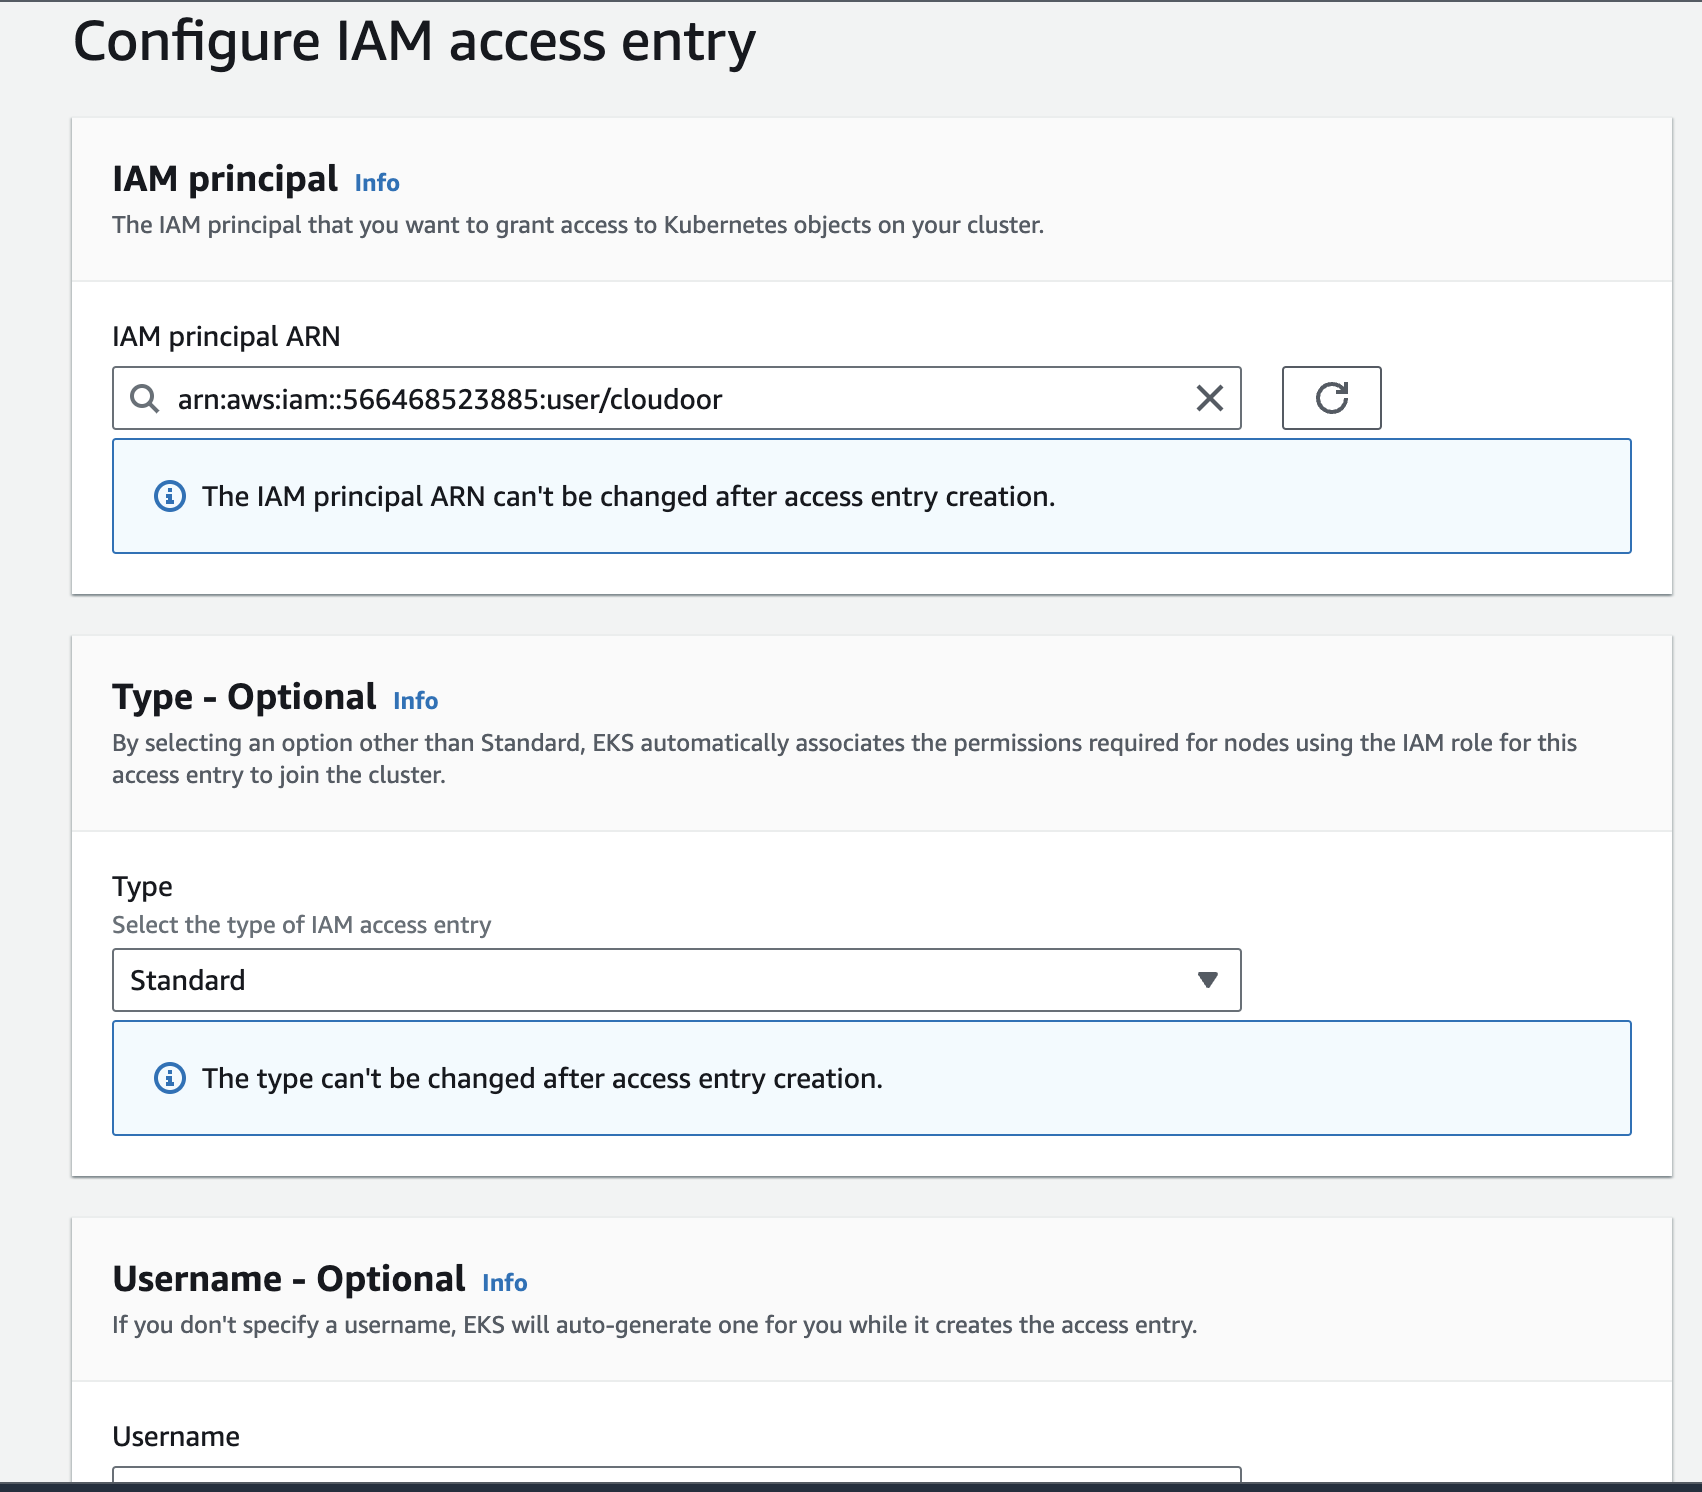
- Scroll down and click "Skip to review and create"
- Scroll down to Step 2 "Add access policies" and click "Edit"

- Search and add "AmazonEKSClusterAdminPolicy" and click "Next".
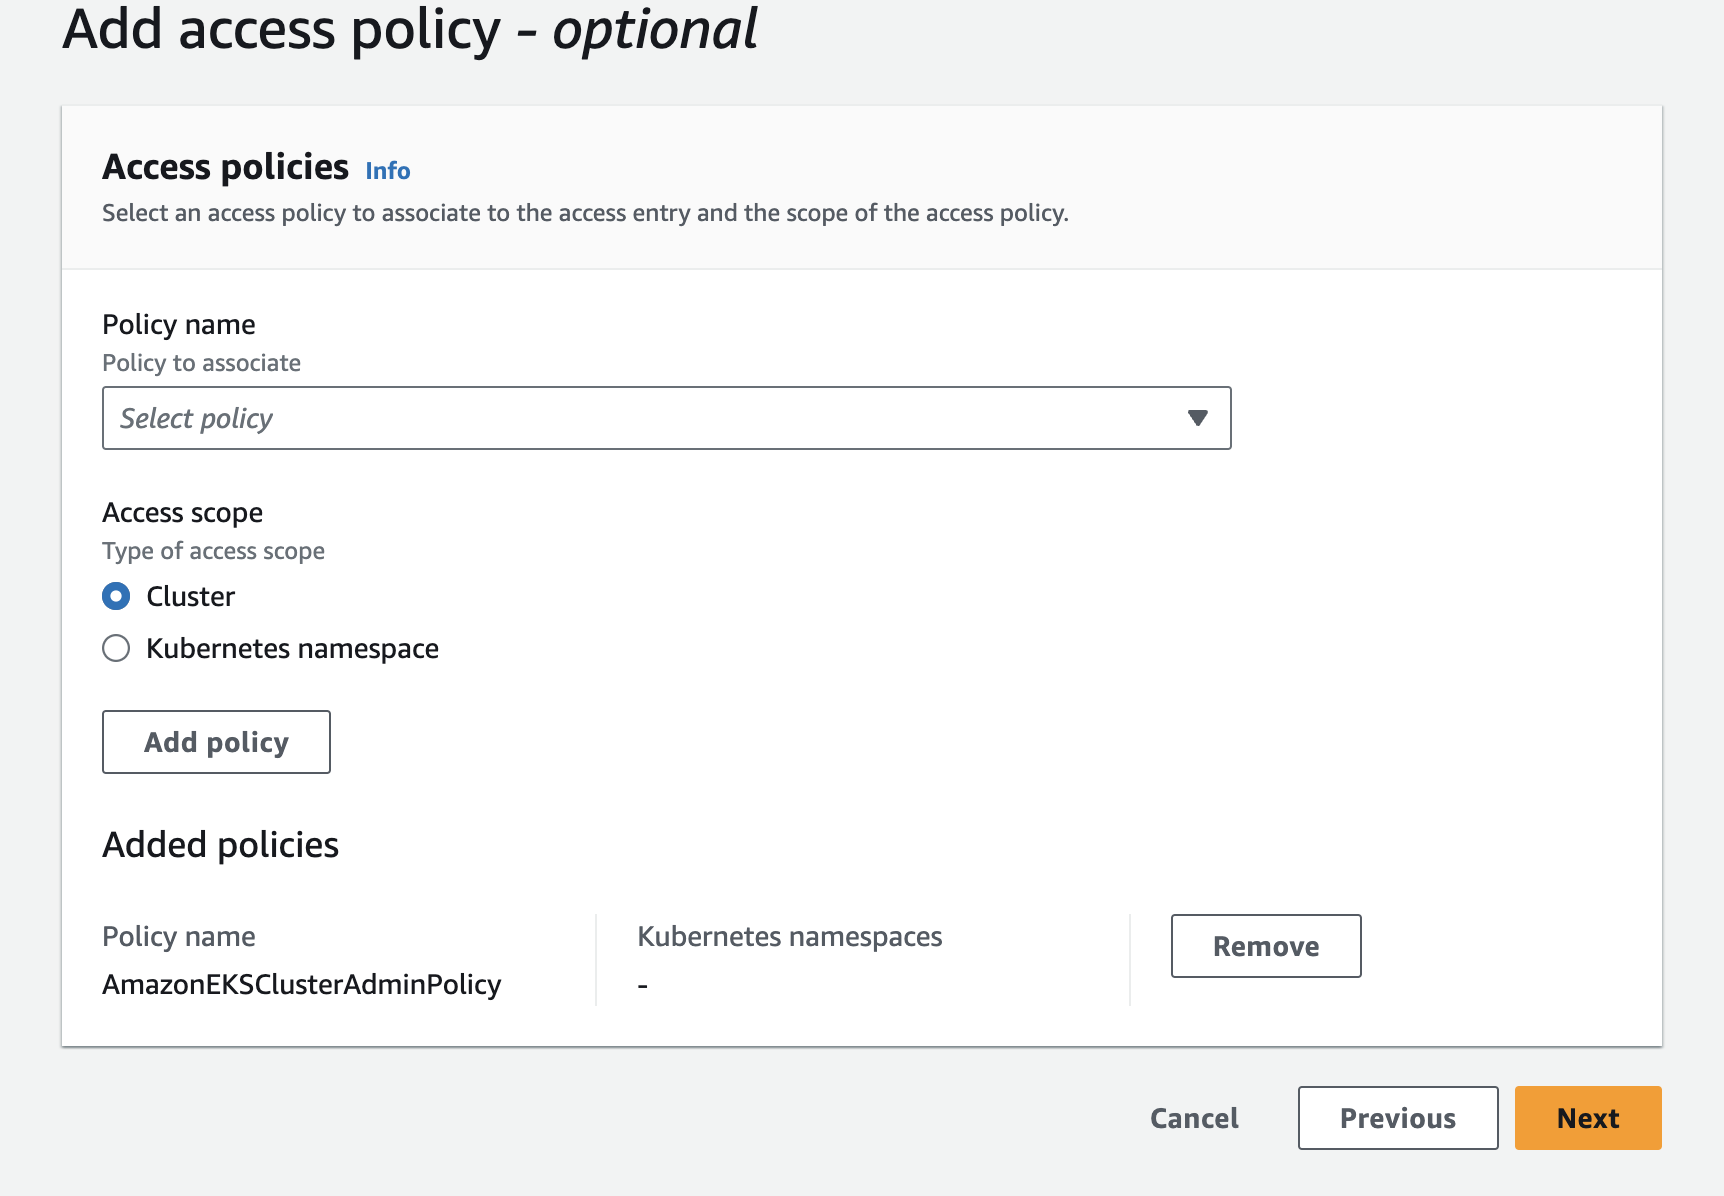
- Click "Create"
Step 5
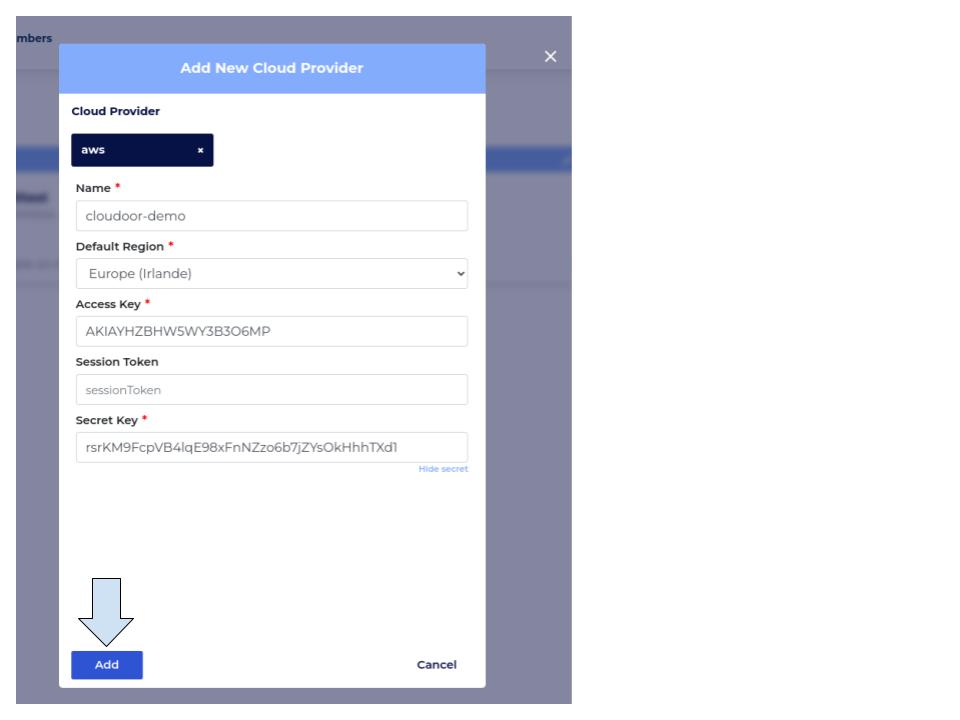
Fill in the cloudoor form and add the AWS cluster on cloudoor
- Fill in the form
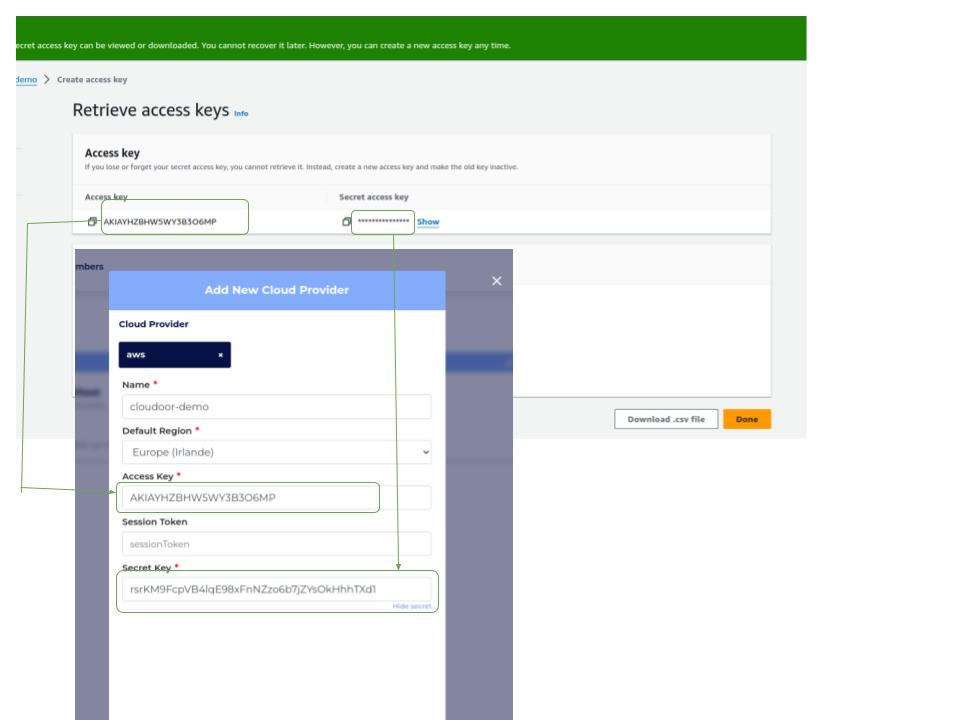
Name: Put organization name Default Region: Select the region equivalent to the one on your AWS console in the right-hand corner 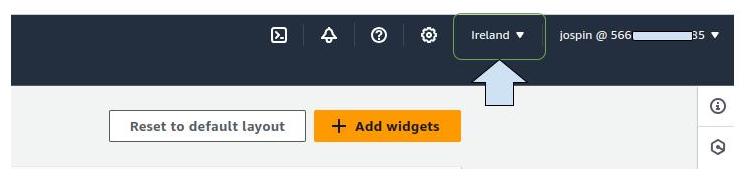
Access Key: Paste the value of the user's "access key" copied above Secret Key: Paste the value of the user's "secret access key" copied above
- Come back on the dashboard, click on the cloud provider that you added and click "Select Provider"
- Select the cluster that you need to onboard and click on "Select my cluster"
Wait a few minutes to see it with the "Connected" status
🎉You have successfully onboarded your AWS cloud provider🎉